Log in to the Avoca Dashboard.
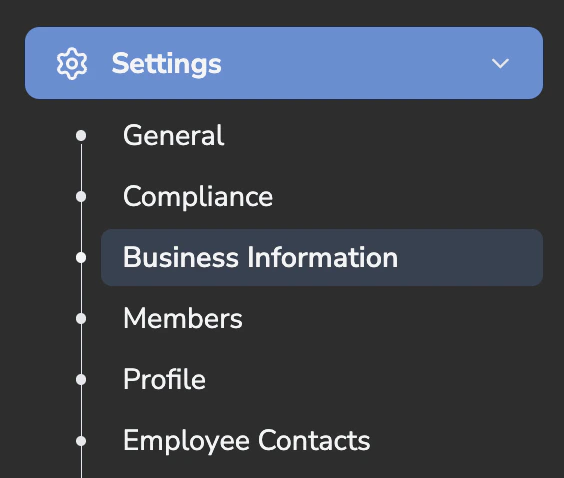
In the left sidebar, go to Settings.
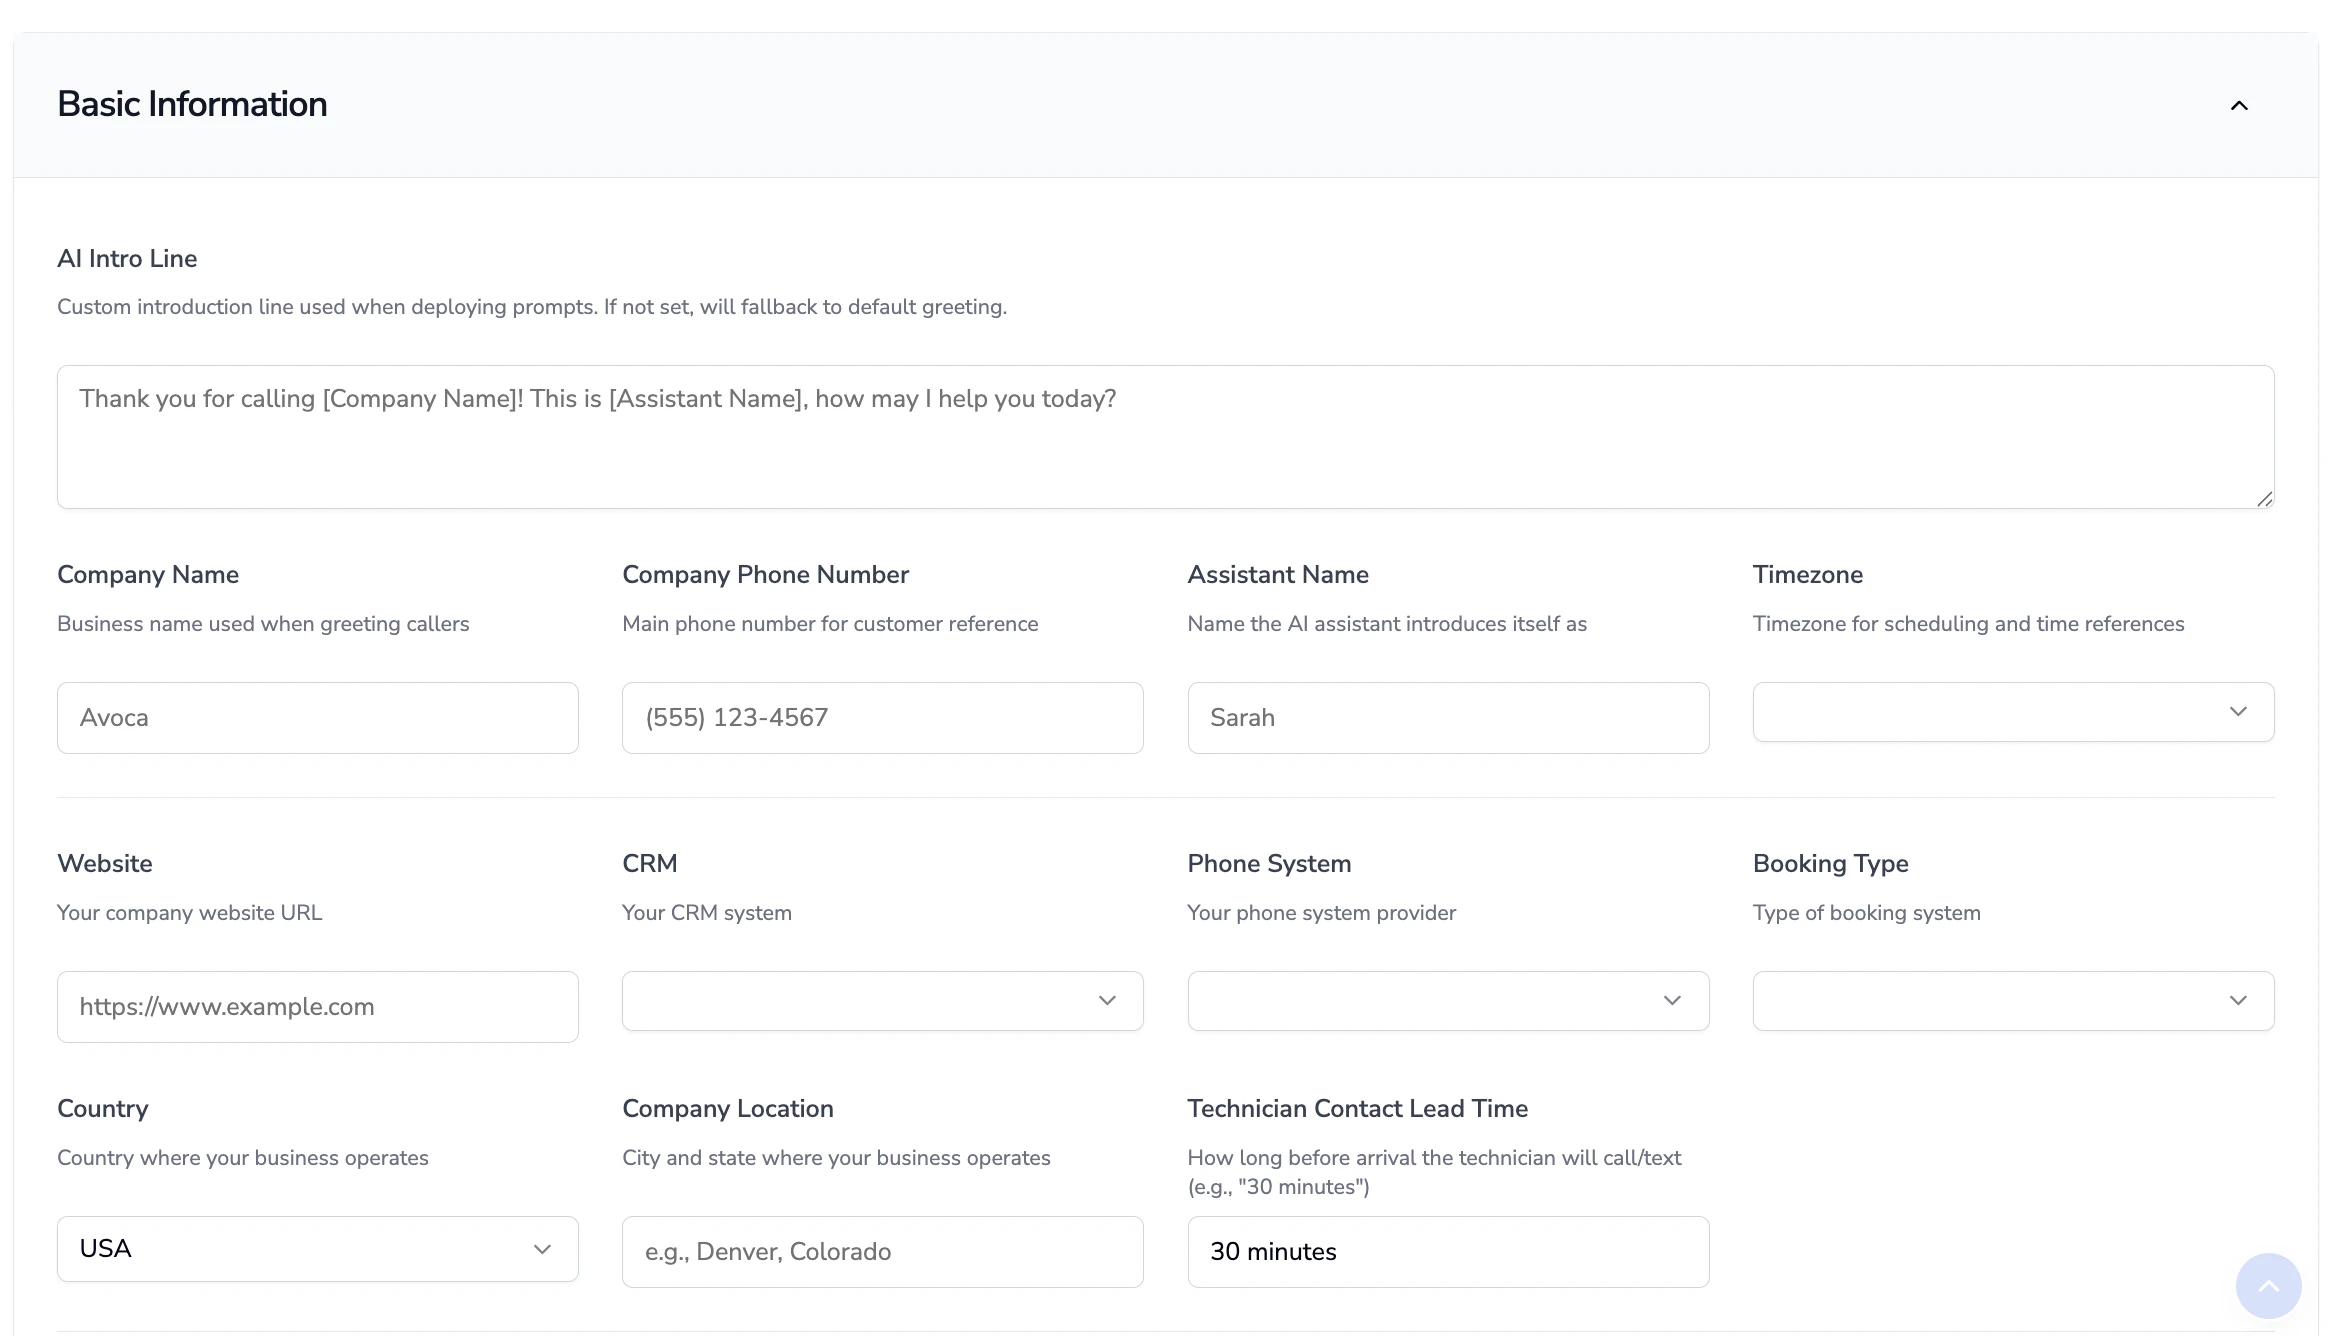
Select Business Information.
- Business Name - Use your legal business name.
- Company Phone Number - Use the main number for your office that is advertised publicly on your website.
- Assistant Name - Choose a name for your AI assistant, which will be used by the assistant to identify itself and introduce itself.
- Timezone - select your timezone.
- Website URL - Use your primary website (include
https://).
- CRM - select ServiceTitan, Housecall Pro, etc.
- Phone System - select Dialpad, Ring Central, etc.
- Booking Type - select ACP, adCap, non-ACP (for manual capacity management), etc.
- ACP — Utilizing Service Titan’s standard Adjustable Capacity Planning (must be activated in Service Titan)
- AdCap — Enrollment in the Adaptive Capacity Planning (must be activated in Service Titan)
- Country - select the country where your business operates.
- Company Location - if your business is in the United States, fill in the state in which your business operates (otherwise, the state or province.)
- (Optional) Technician Contact Lead Time - enter the realistic lead time you would want the assistant to provide the customer for ETA calls.
- Note that by default, our bot will over a 1 hour minimum lead time
- (Optional) Offer Closing Line - enter a closing message for ETA calls to let customers know when they can expect to hear from their technician. Two most common configurations:
- The technician will contact you when they are 30 minutes away
- The technician will contact you when they are on their way
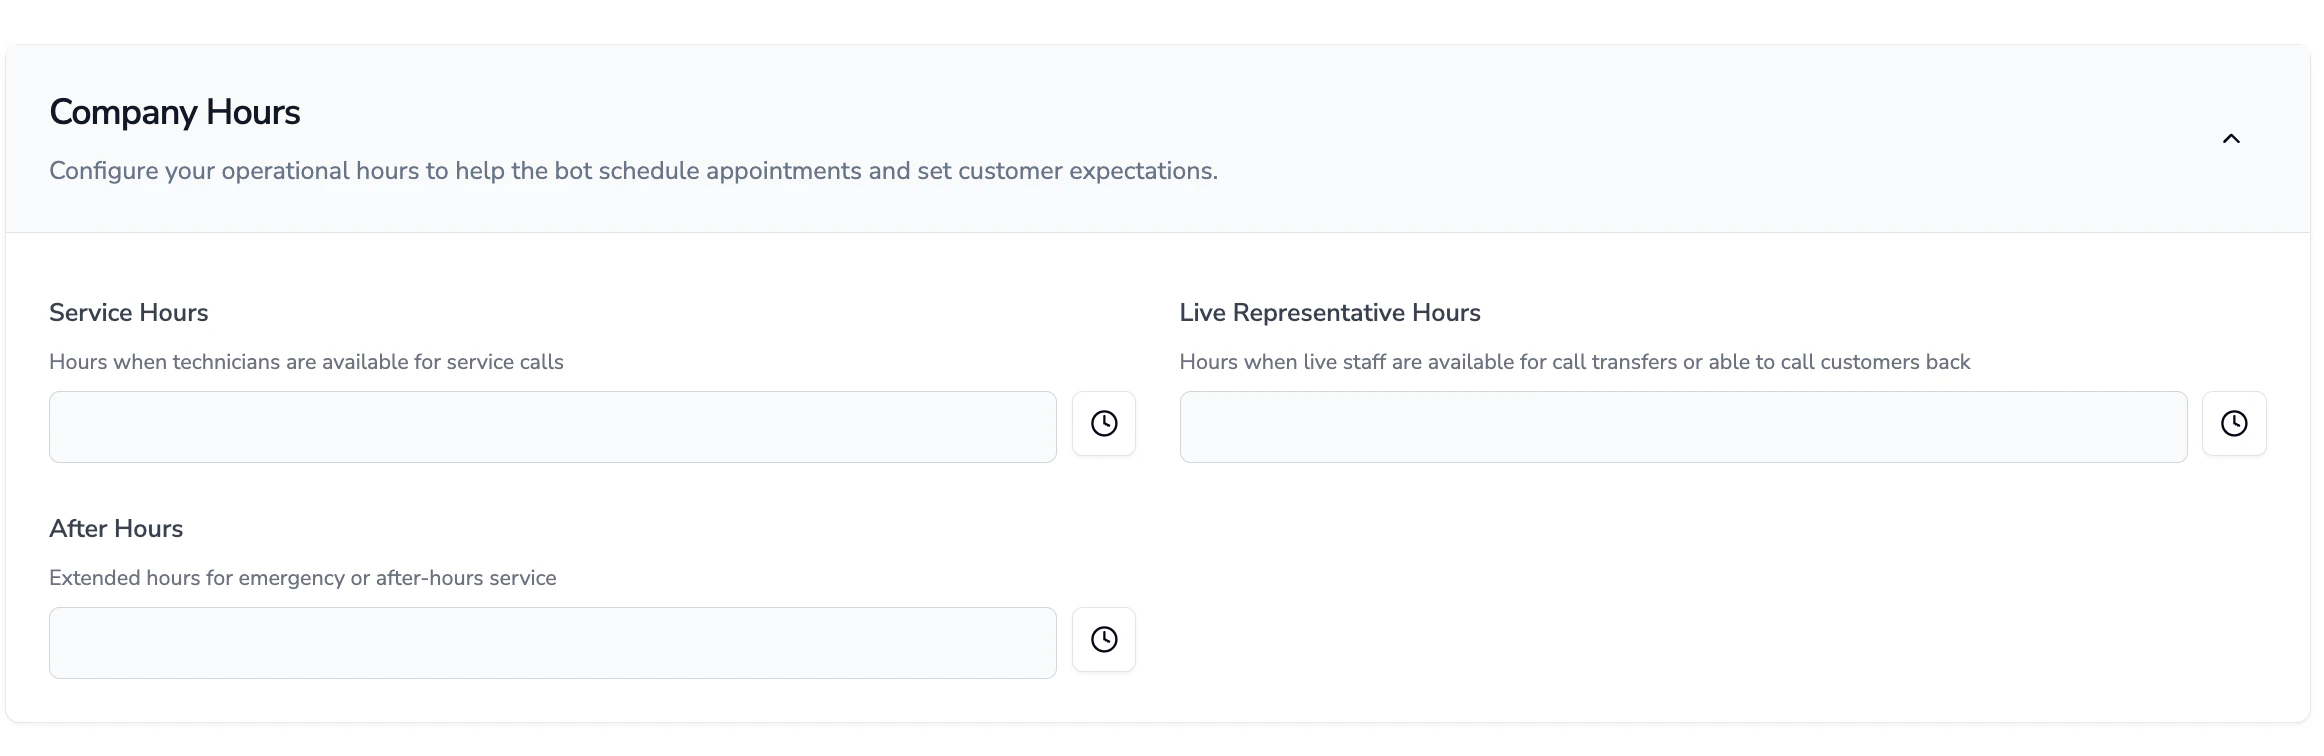
2) Fill in Company Hours (For forwarding schedule)
- Click on the clock symbol by the Service Hours, Live Representative Hours, and After Hours to set the days of the week and times of the day that your business operates.
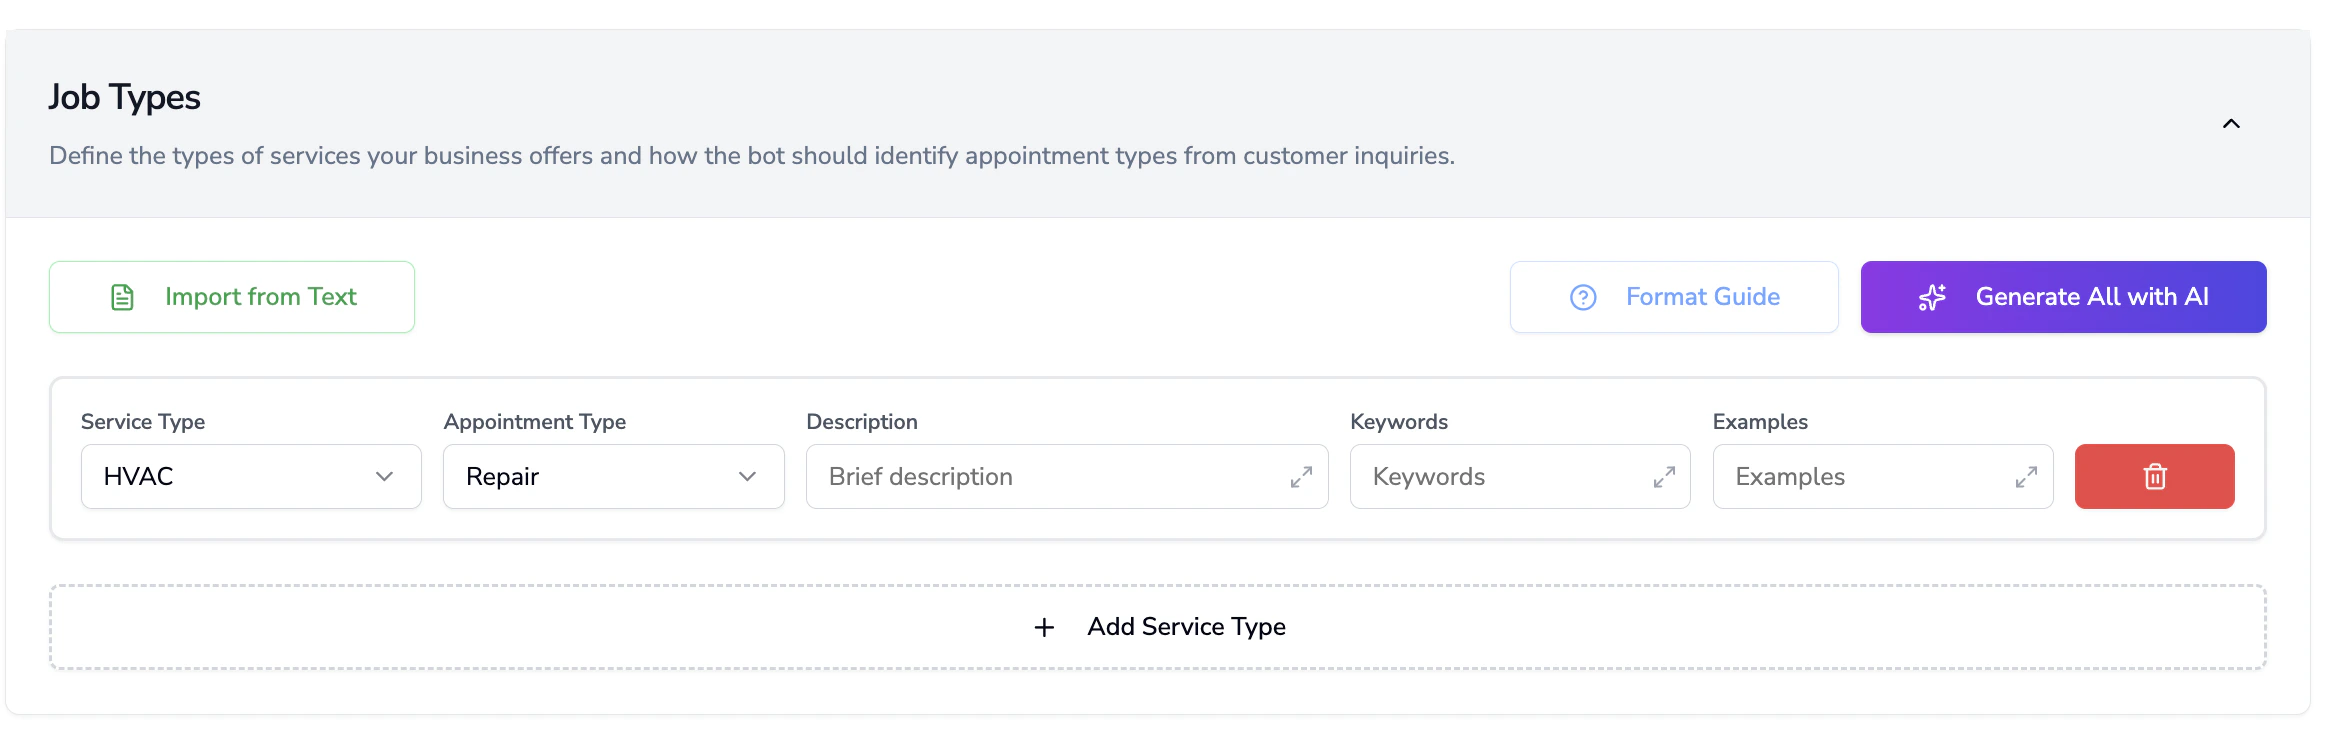
3) Fill in Job Types
- Click on Add Service Type
- On the dropdown under Service Type, select the type of service your business offers - if it is not on the list, select Custom
- Select the Appointment Type on the dropdown
- if it is not on the list, select Custom
- Repeat these steps for all services offered by your company
- Once done, click Generate All with AI and AI will fill in the Description, Keywords, and Examples columns
- Review all AI-generated text for accuracy
- Note that job types with abbreviated or internal naming schemas may need to be manually entered
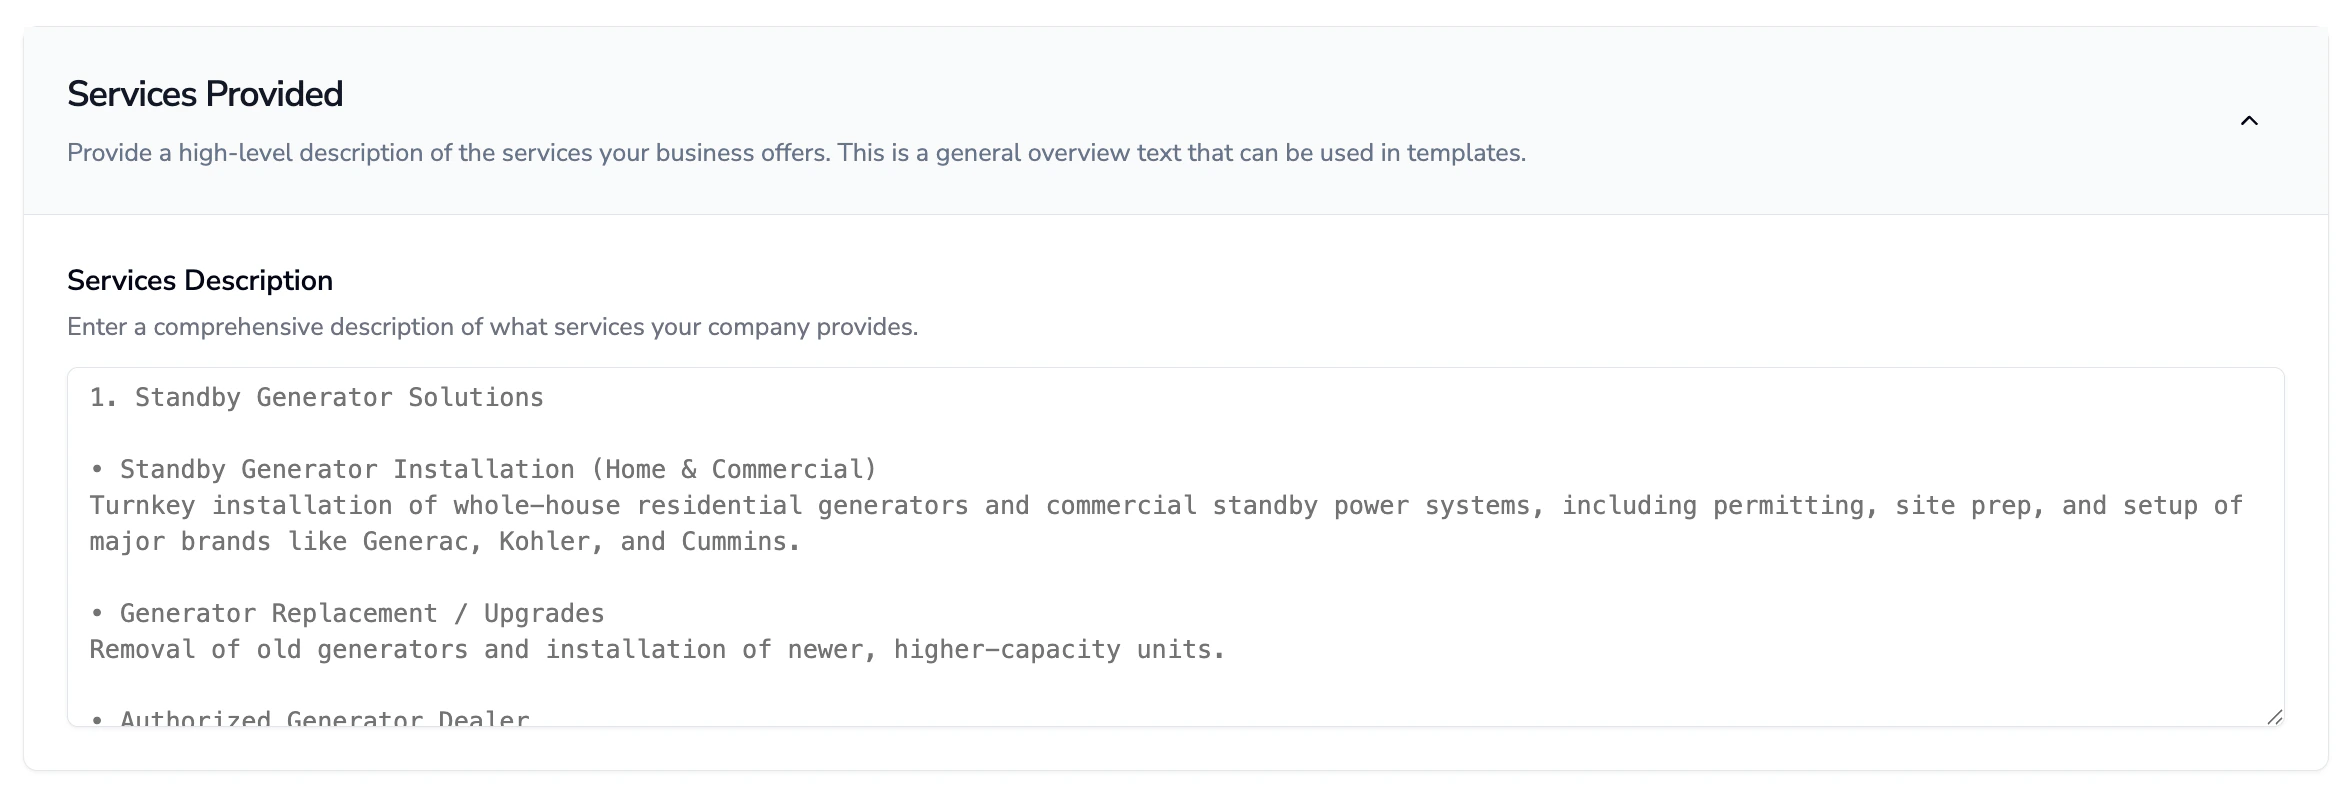
4) Fill in Services Provided
This is a more detailed version of your job types section and provides more context to your AI assistant on what services are provided by your company. Note: These will not impact job types. Use a clear and concise bulleted or numbered list here and aim to be as comprehensive as possible.
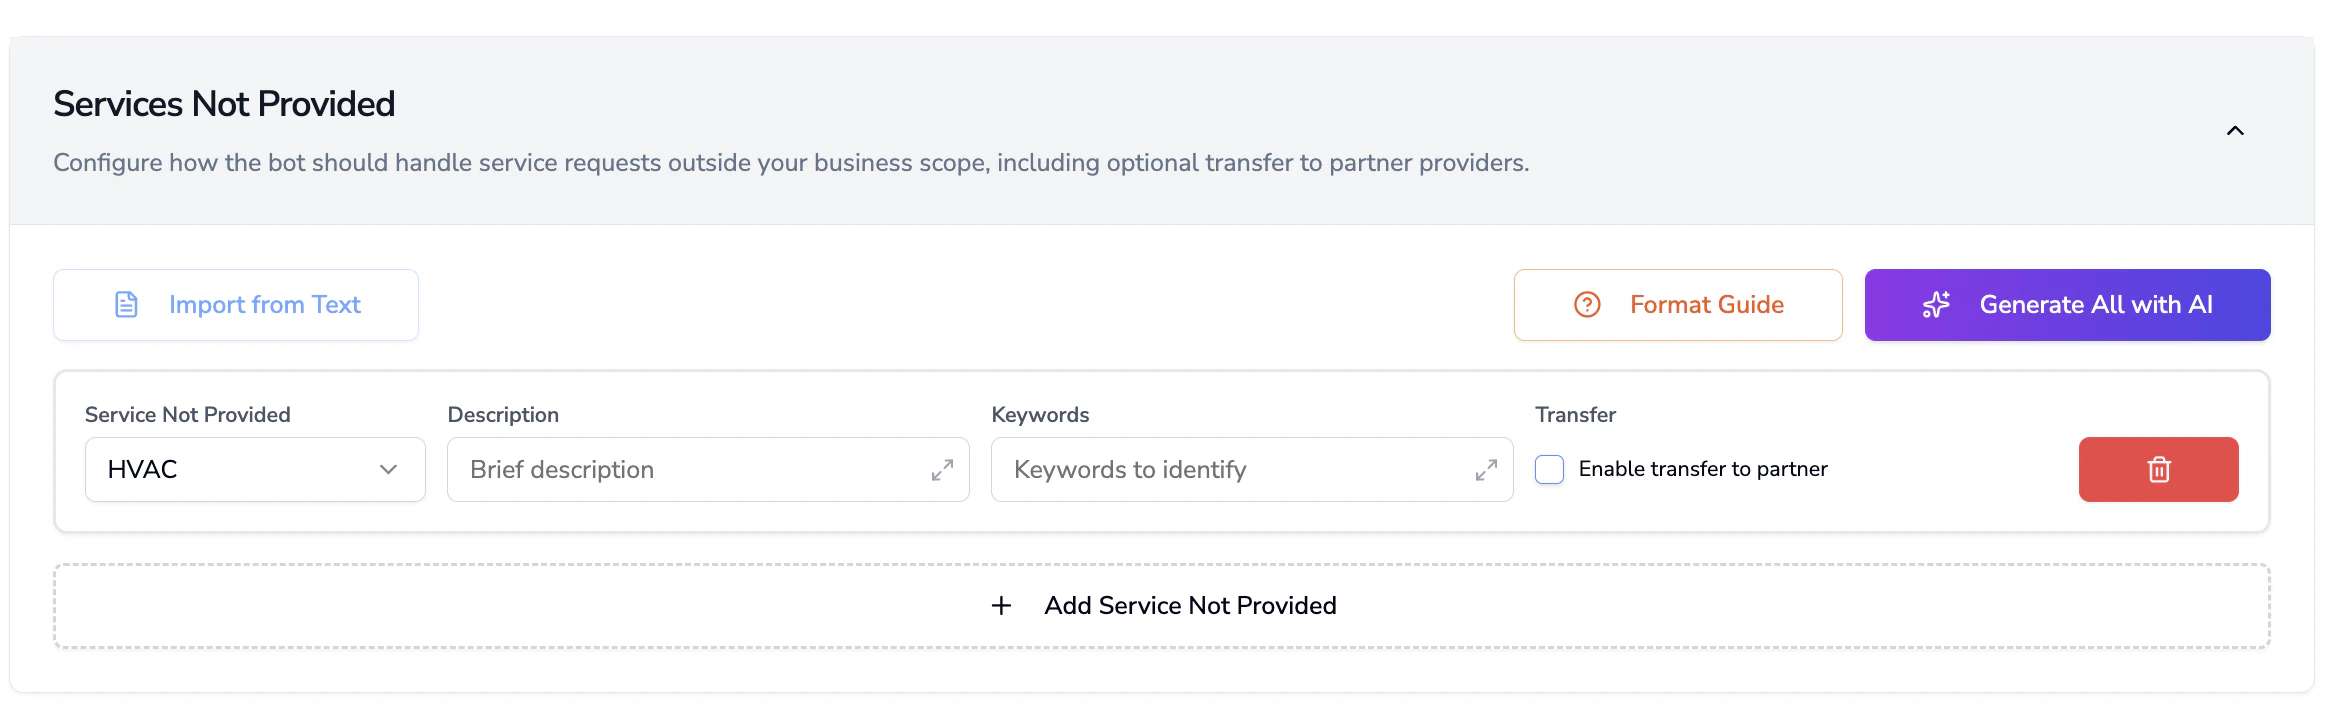
5) Fill in Services Not Provided
- Click on Add Service Not Provided
- Follow the same instructions as section 3) Fill in Services Provided
This will guide the bot to ensure to incorrect bookings for uncovered services within a practice are made ‘i.e “We handle septic tank pipe repairs, but not septic tank pumping”
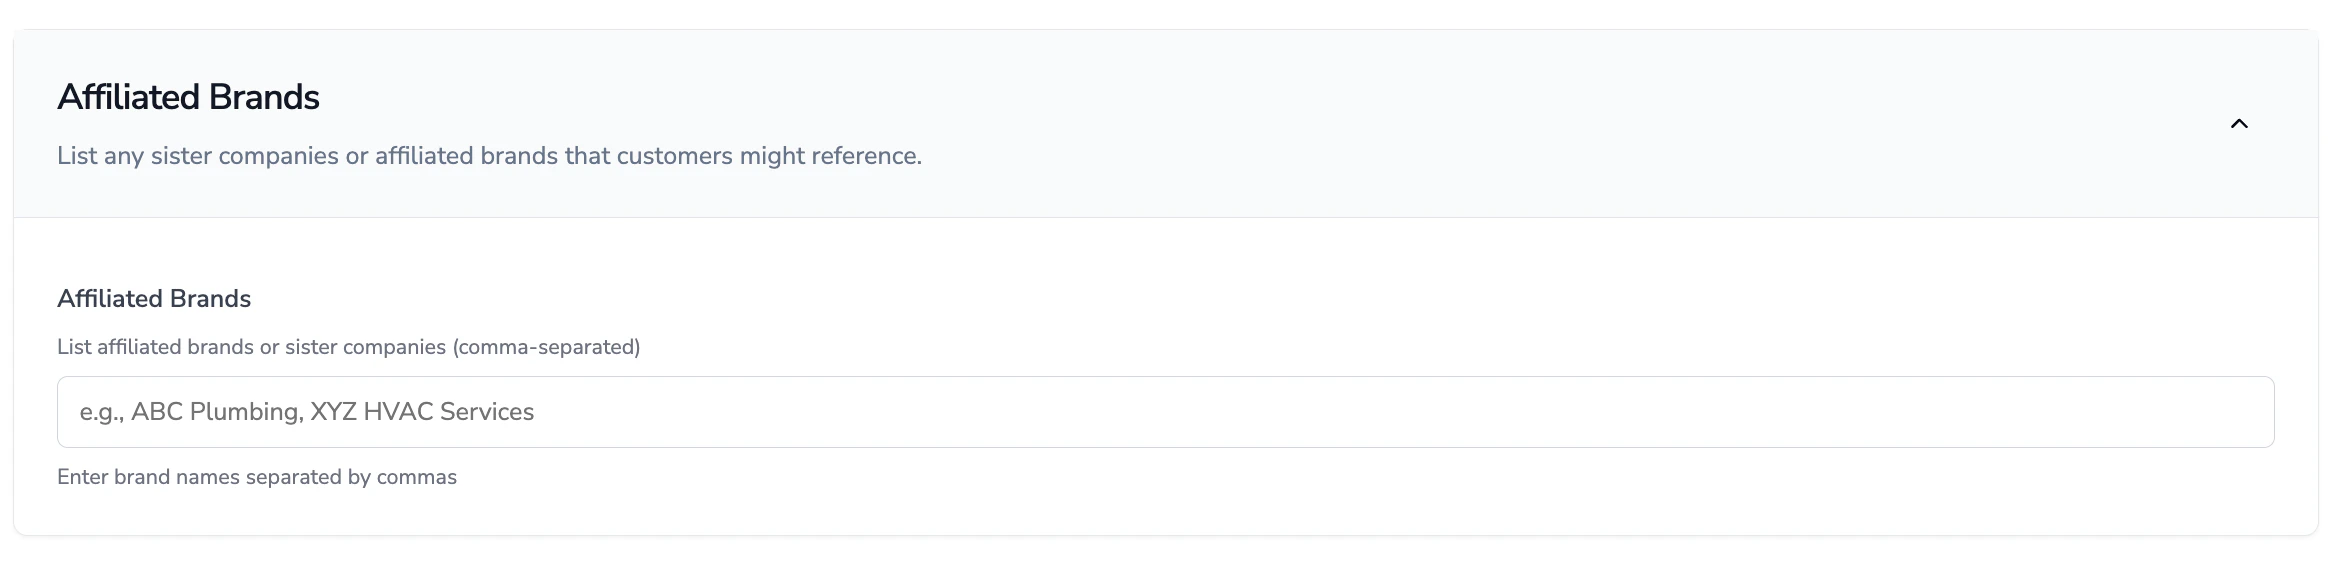
6) Fill in Affiliated Brands
- List affiliated brands that your customers may refer to your company as in a comma-separated format
- This helps the AI to identify that a customer is inquiring about the same company if they mention the name of one of your affiliated brands
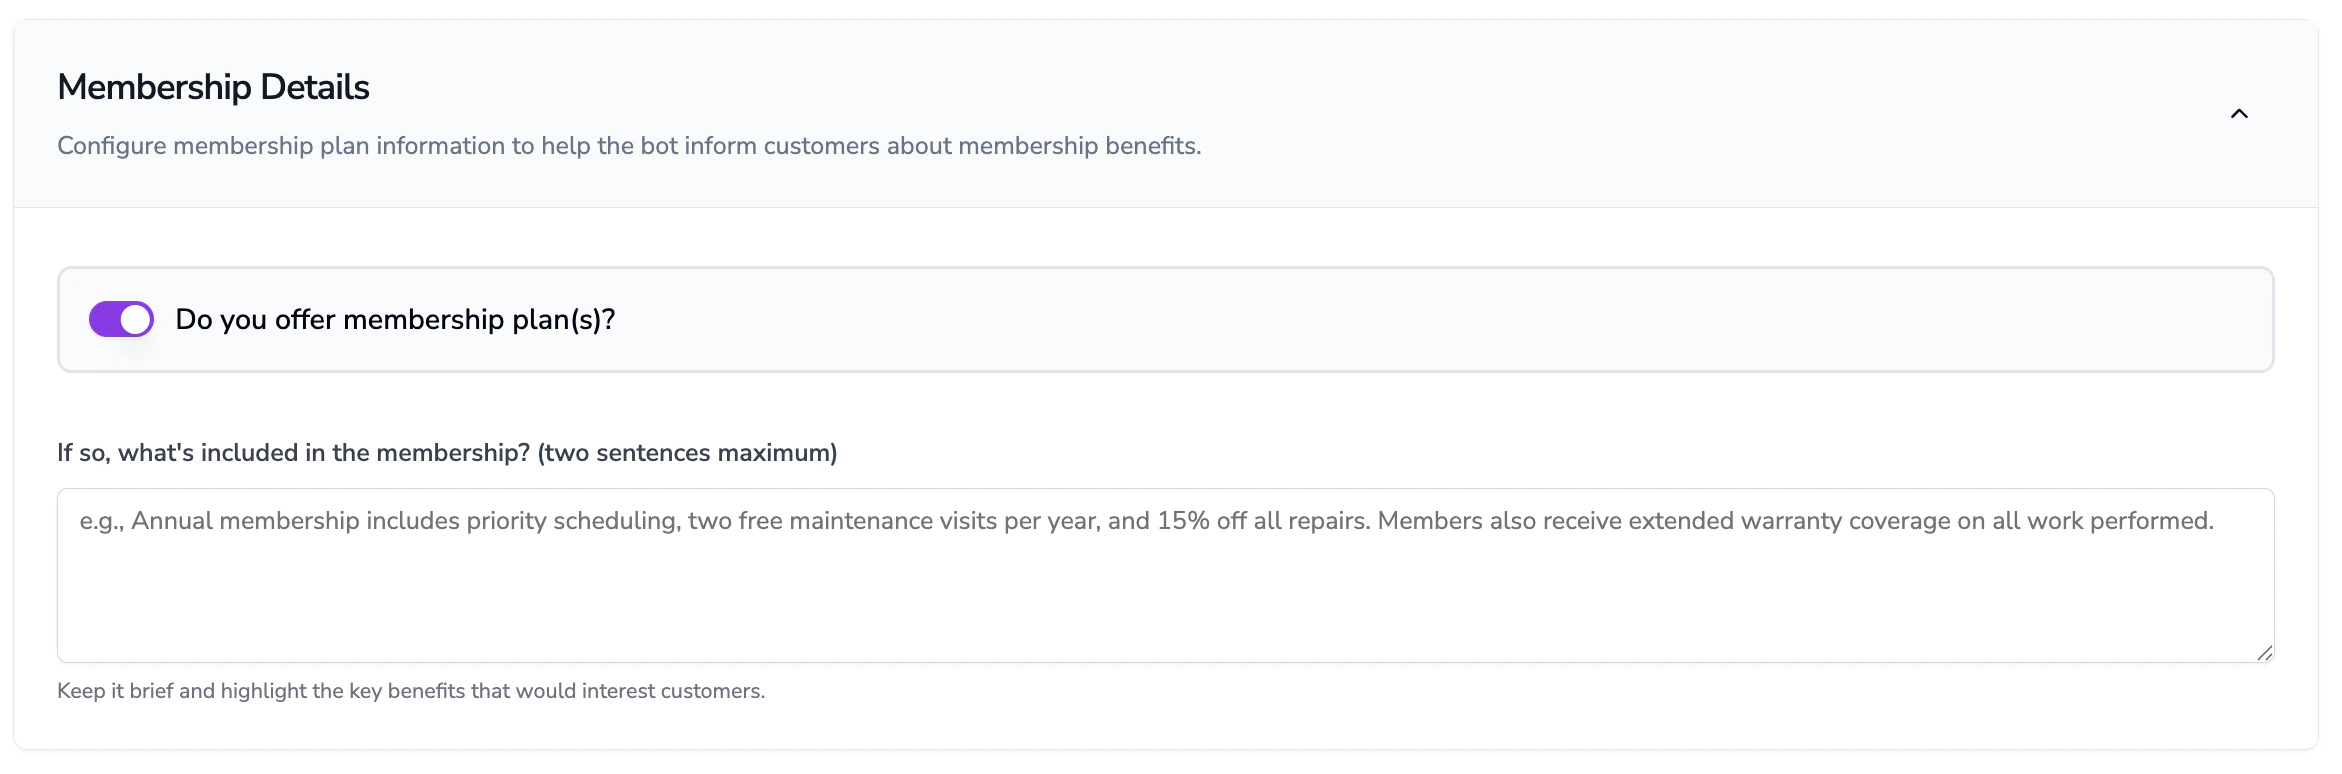
7) Fill in Membership Details
- If you offer a membership plan for your customers, toggle on the membership plan offering
- Next, describe what is included in your membership. This is the talk track that the AI assistant will use to describe your membership benefits, so make sure that it is grammatically correct, comprehensive, and clear so that the same message can be relayed to your customers
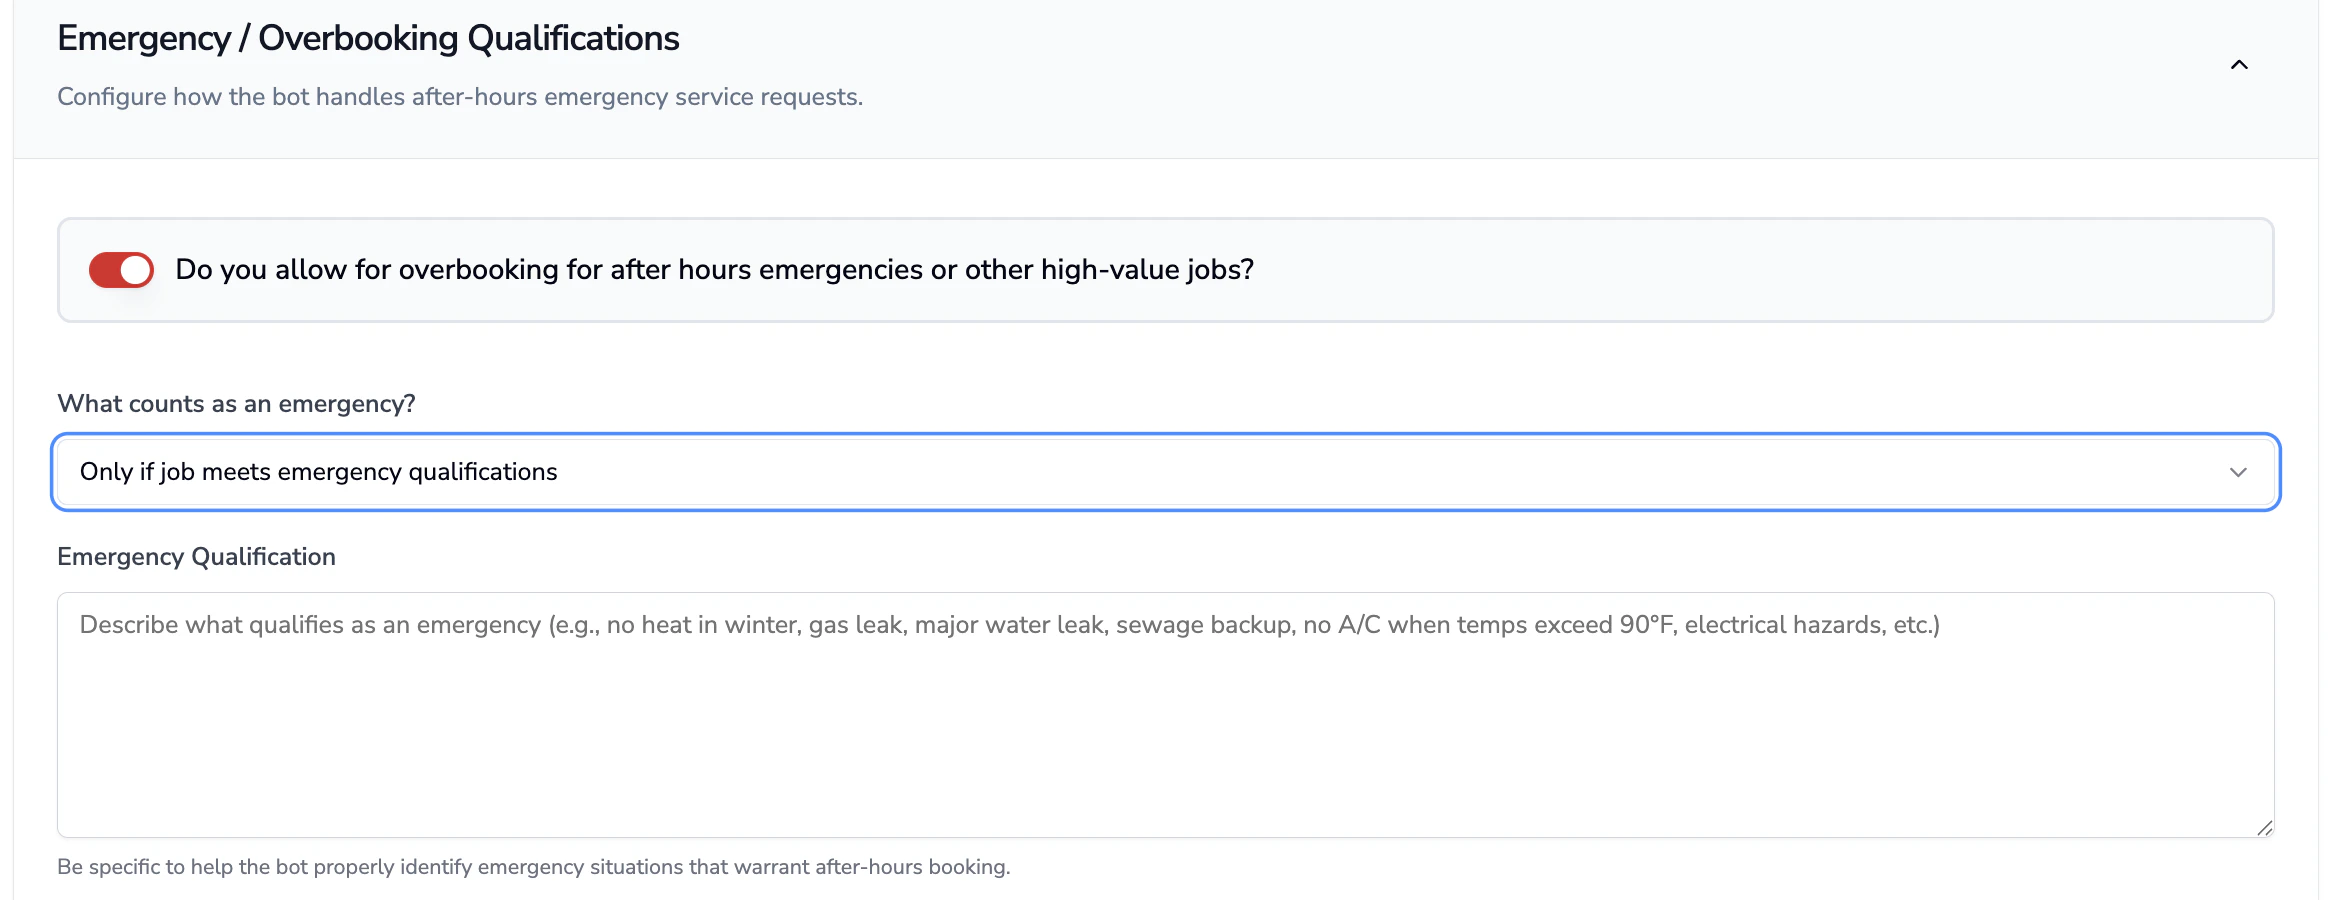
8) Fill in Emergency/Overbooking Qualifications
- If you want to allow customer to overbook for after hours emergencies or other high-value jobs (skip capacity check), toggle this selection on
- After this, select whether you want an emergency to be booked based on your company’s emergency qualifications or on a customer’s indication of emergency
- Finally, use a bulleted list to describe what types of situations qualify as an emergency, for example:
- No heat
- No cool
- Furnace not working with elderly in the home
9) Fill in Languages
- Click the Add Language button to select what language the majority of your customers speak
- If you need to add a second language to the bot, speak with your technical account manager or customer success representative to learn more about the best ways to configure this in Avoca
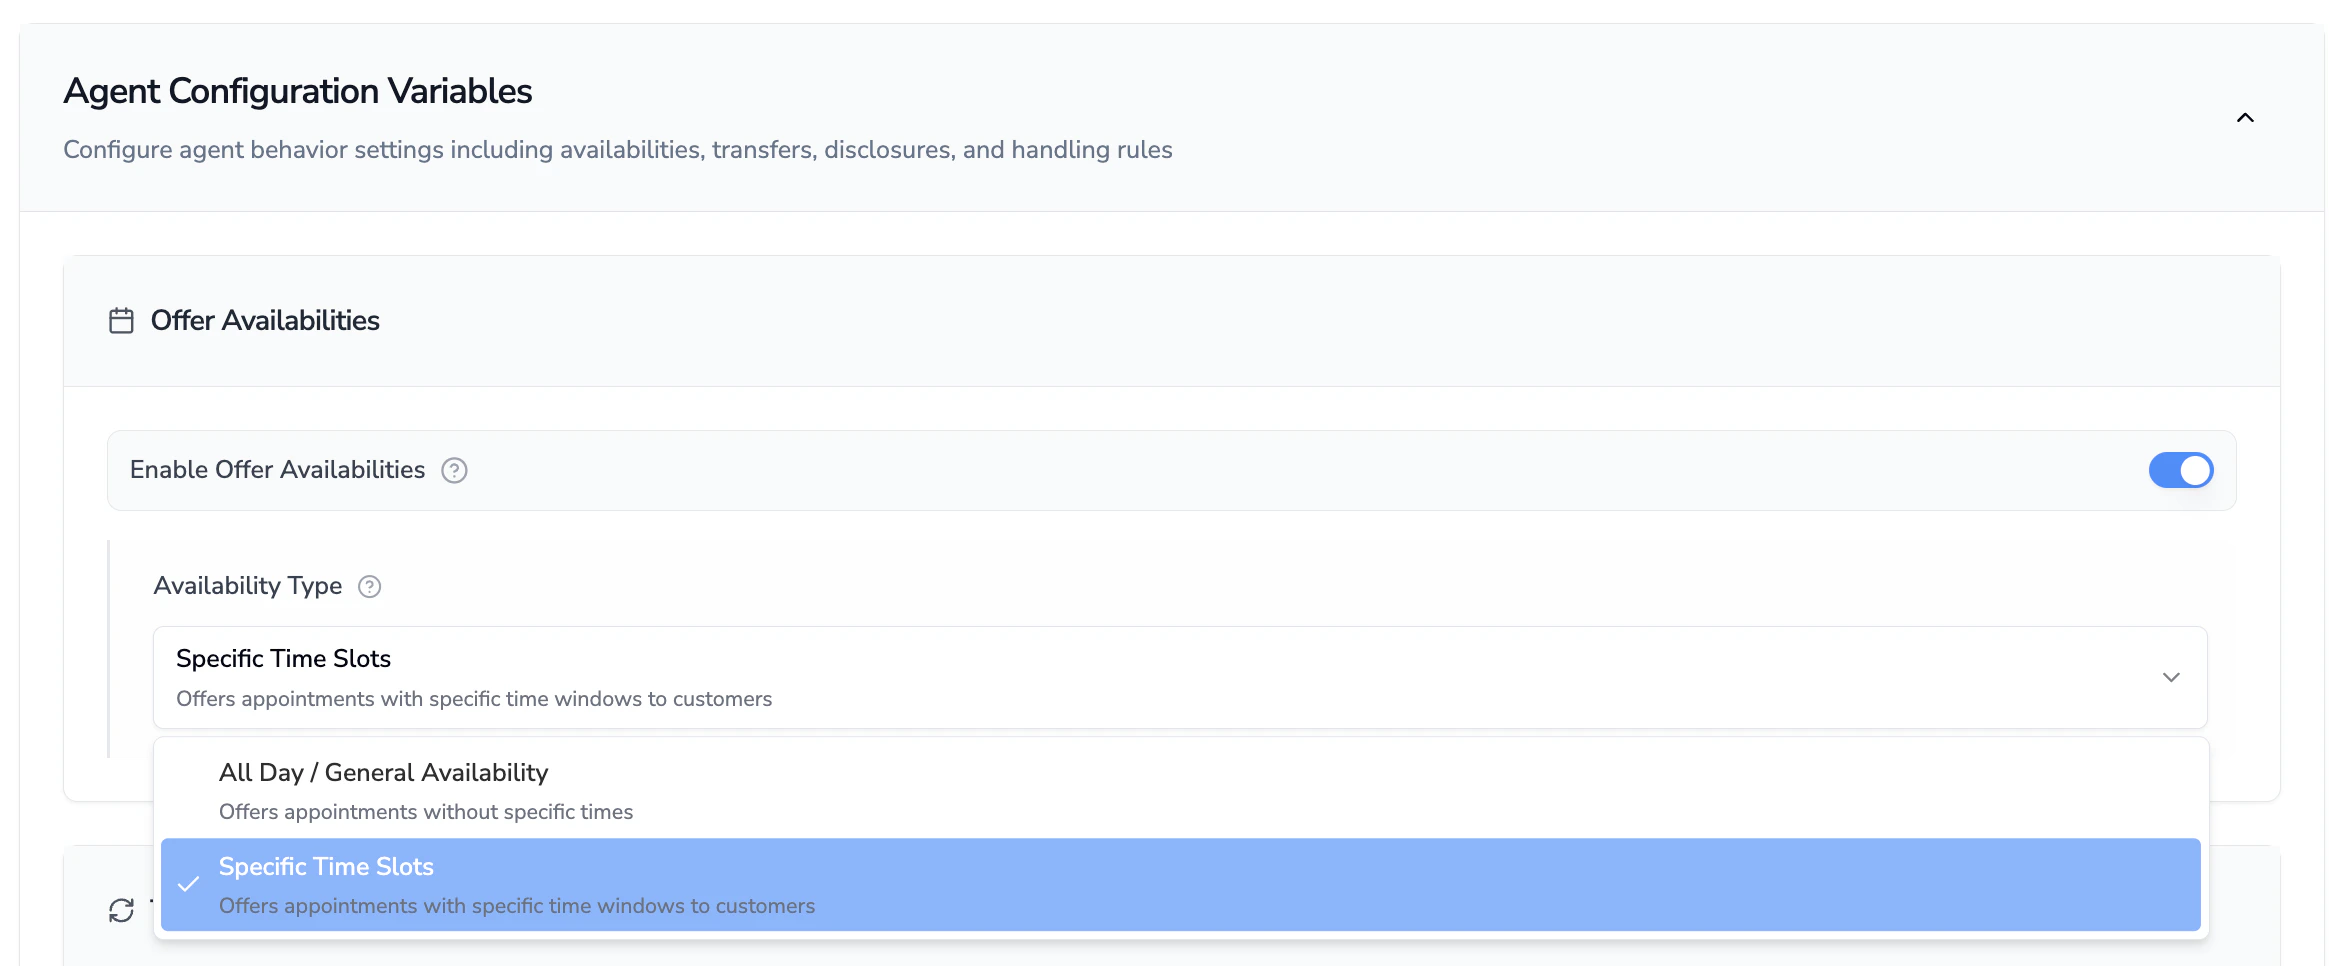
10) Fill in Agent Configuration Variables
- Offer Availabilities
- Toggle this on if you want the agent to offer available booking time frames to customers (most commonly this is toggled on)
- In the dropdown for Availability Type, select Specific Time Slots or All Day/General Availability
- Specific Time Slots - select this option if you want the assistant to let the customer know specific time slots (e.g., 8 AM - 12 PM) for a customer’s booked appointment
- All Day/General Availability - select this option if you want the assistant to use more vague terms to promise appointment bookings to a customer (e.g., Morning, Afternoon, Evening)
- Transferring (General)
- Enable general transferring if you are signed up for the Avoca Hybrid product (separately billed) or would like to allow Avoca to transfer back to your office
- Select Transfer to Avoca CSR Team - if you are on the Hybrid product
- Select Transfer to Your Own Team - if you want to transfer back to your office (not recommended for customers using Avoca for an afterhours/overflow solution)
- Select Apply Time-Based Transfer Rules if you need to control transferring based on office hours (if transferring back to your own team)
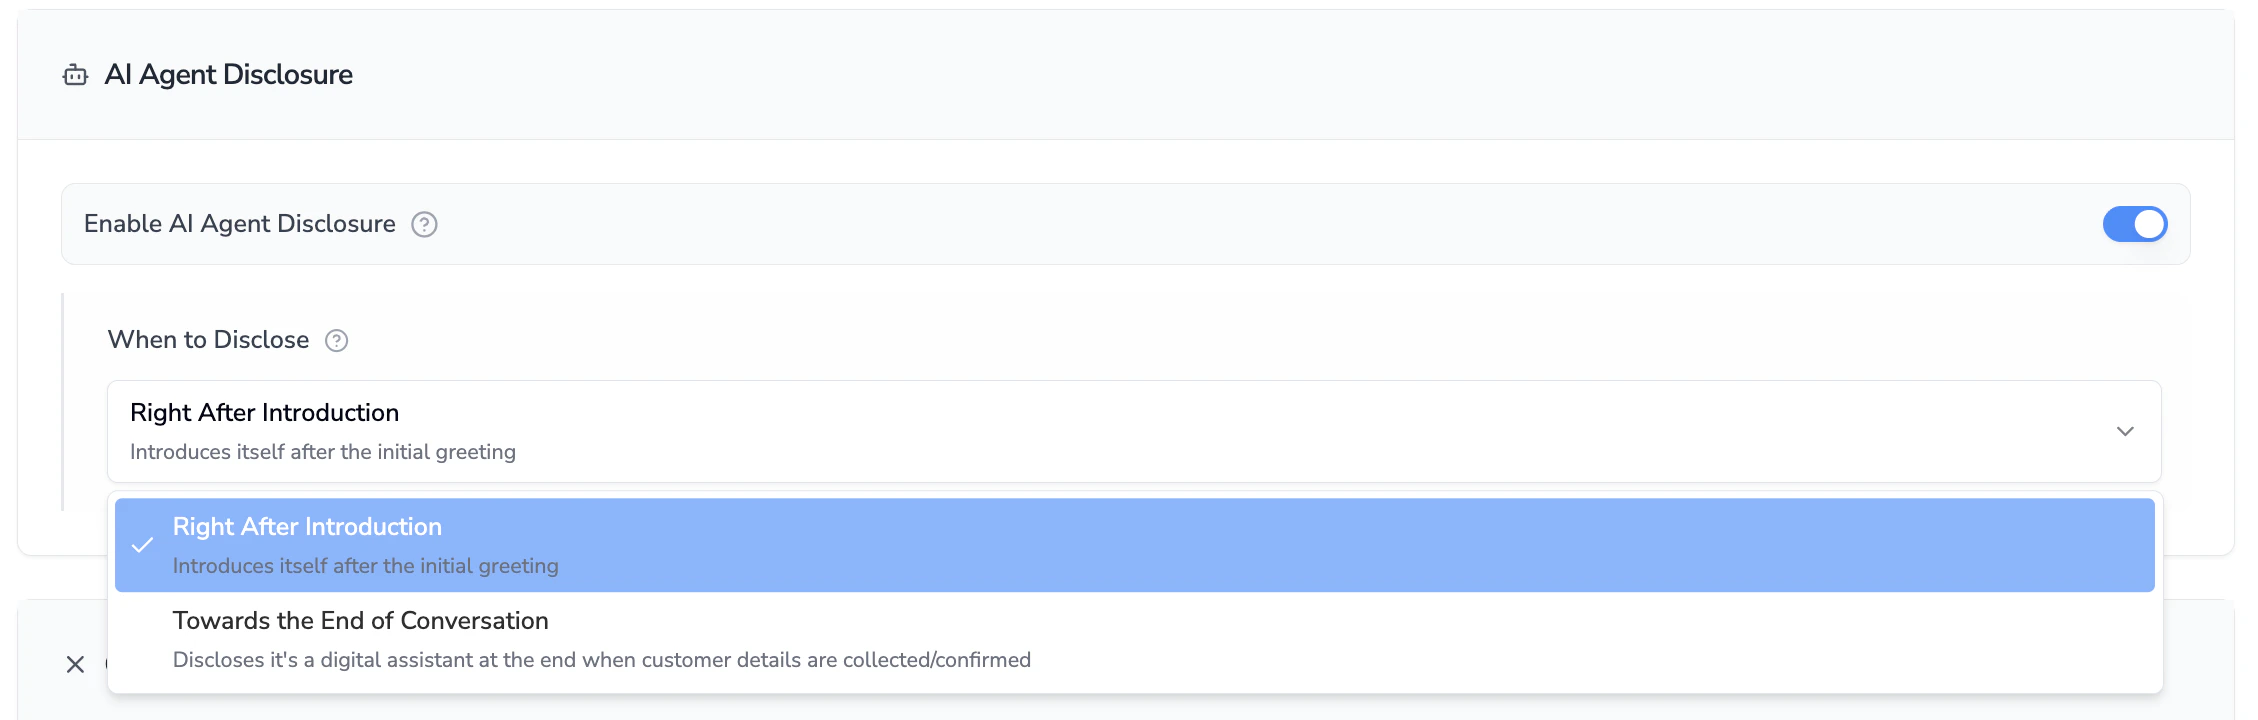
- AI Agent Disclosure
- Enable this disclosure if you want the assistant to disclose that it is an AI agent
- Select at what point in the conversation (beginning or end) the assistant should disclose this
- Note: Even if this is toggled off, if the customer pushes and asks the assistant to identify itself, it will reveal that it is AI due to AI safety safeguards
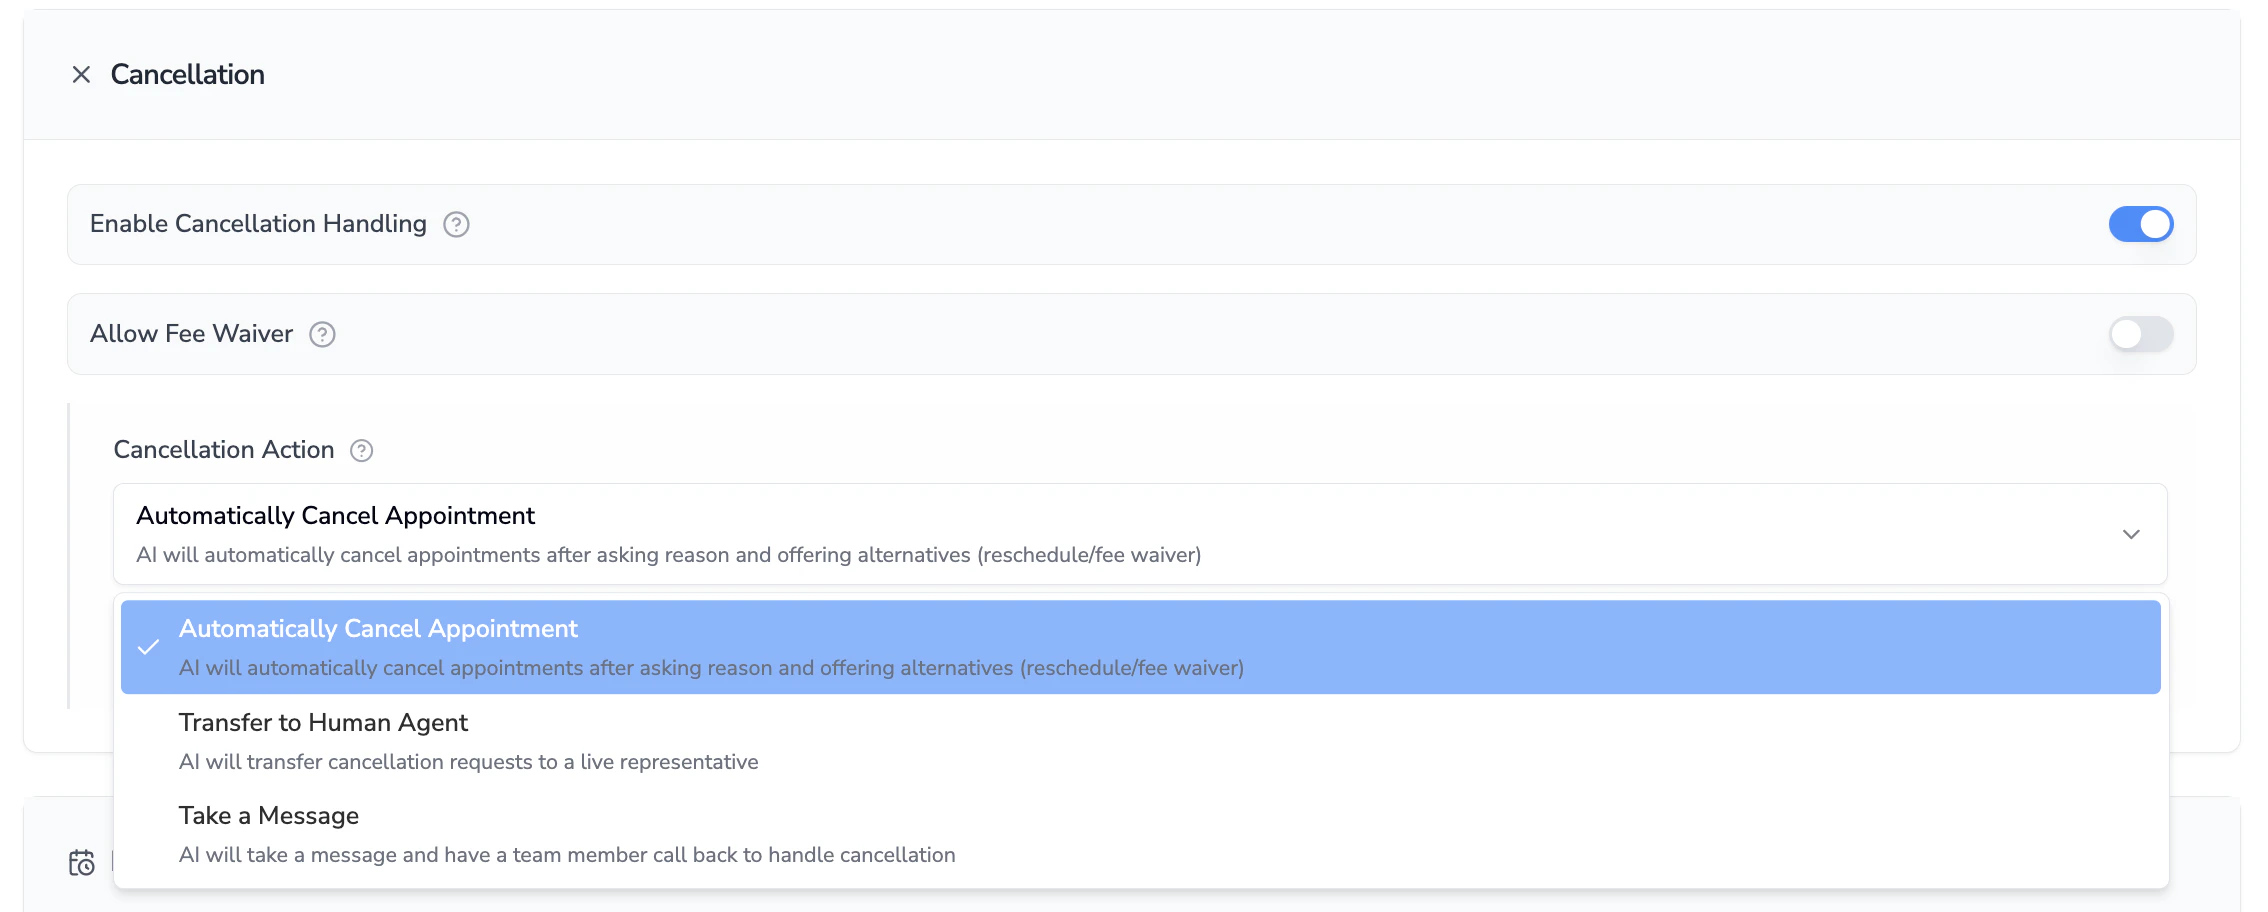
- Cancellation
- Enable this if you want the assistant to be able to handle cancellation requests from customers
- Select from the dropdown the appropriate action the assistant should take when the customer requests cancellation:
- Automatically cancel
- Transfer to a human agent (only if Transferring is enabled)
- Take a message
- Check off the Allow Fee Waiver box if you want the assistant to offer waiving the dispatch fee to the customer to save the job before moving forward to cancelation
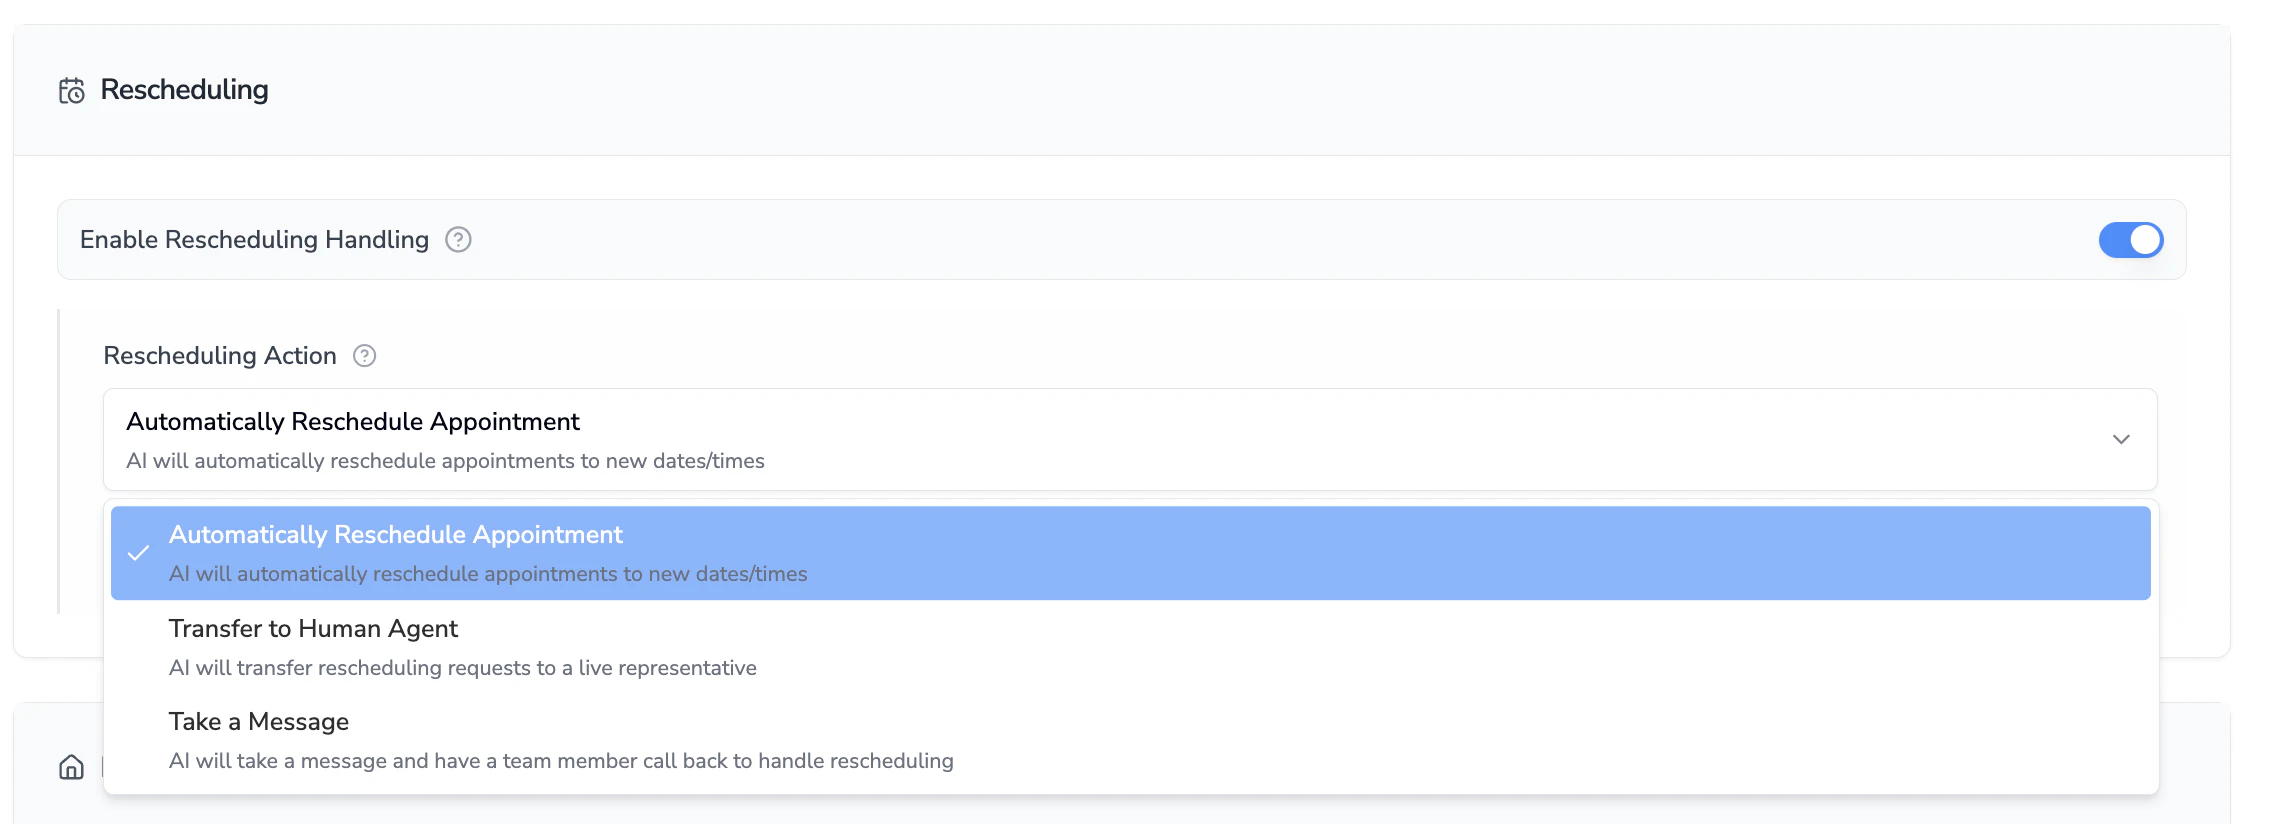
- Rescheduling
- Enable this if you want the assistant to be able to handle reschedule requests from customers
- Select from the dropdown the appropriate action the assistant should take when the customer requests rescheduling:
- Automatically reschedule
- Transfer to a human agent (only if Transferring is enabled)
- Take a message
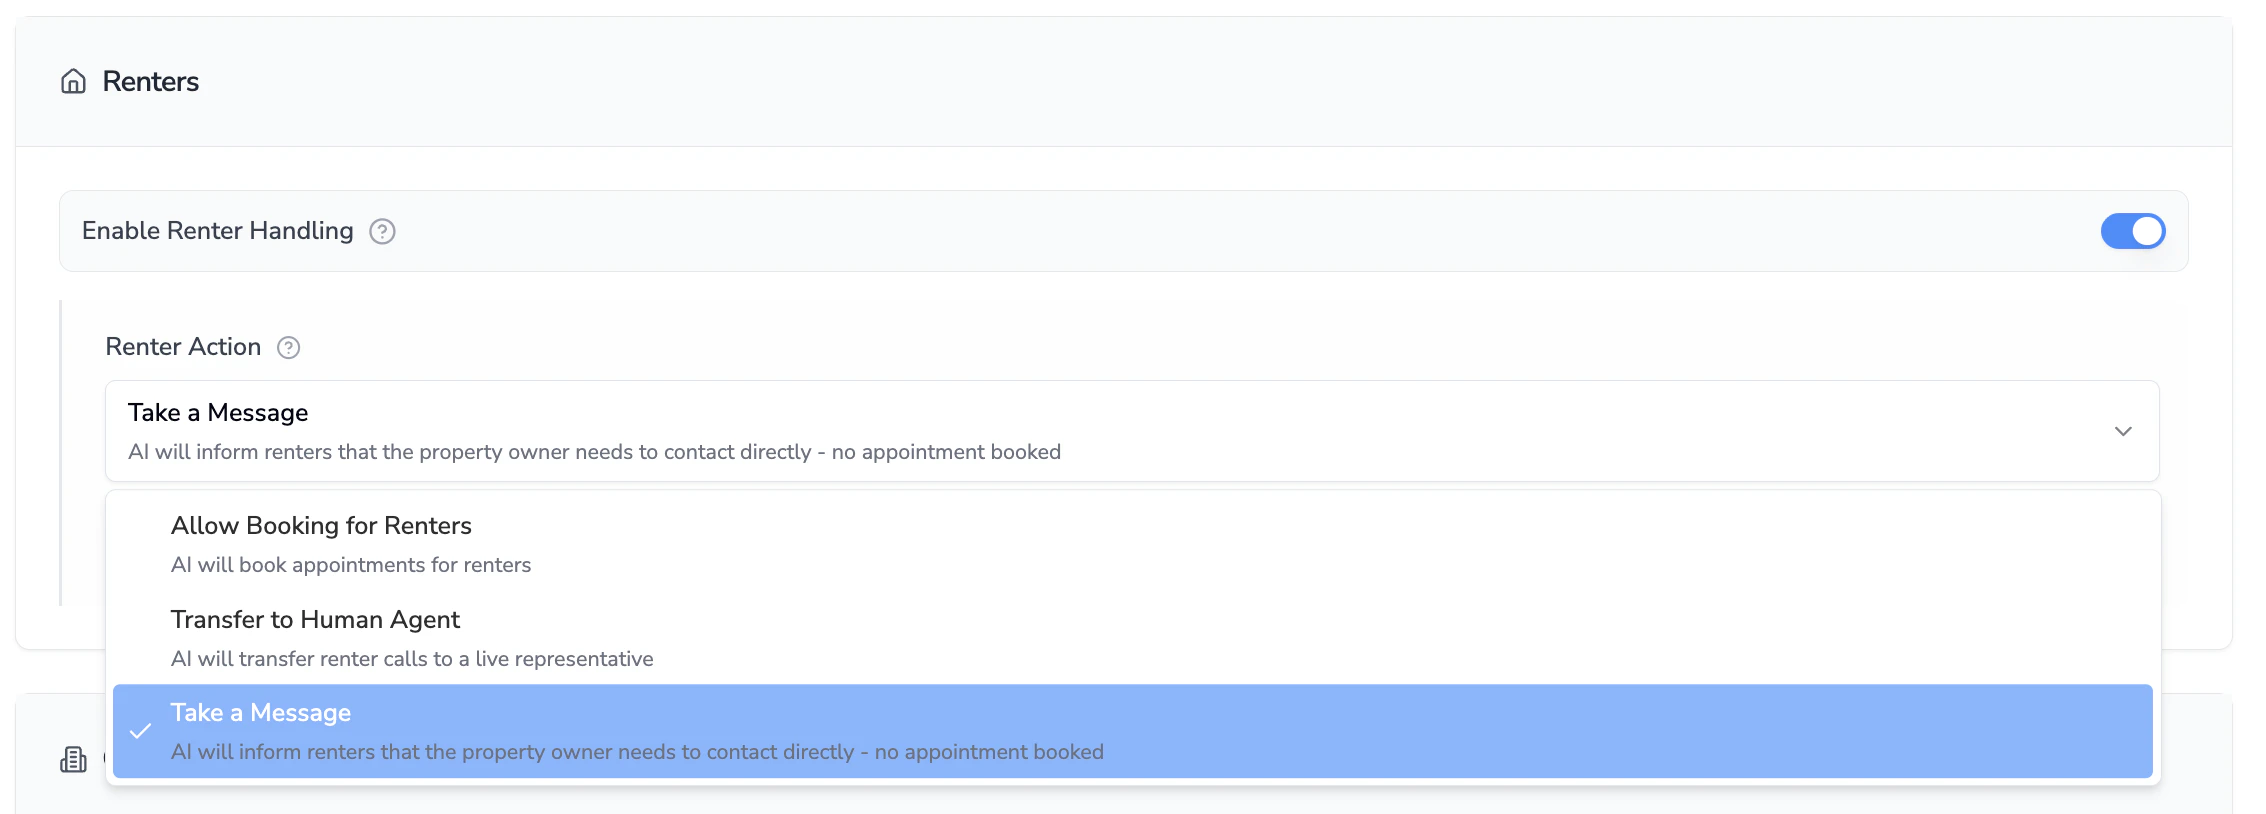
- Renters
- Enable this if you want the assistant to be able to handle customers calling in to schedule an appointment for a rental property
- Select from the dropdown the appropriate action the assistant should take when the customer is a renter:
- Allow booking
- Transfer to a human agent (only if Transferring is enabled)
- Take a message
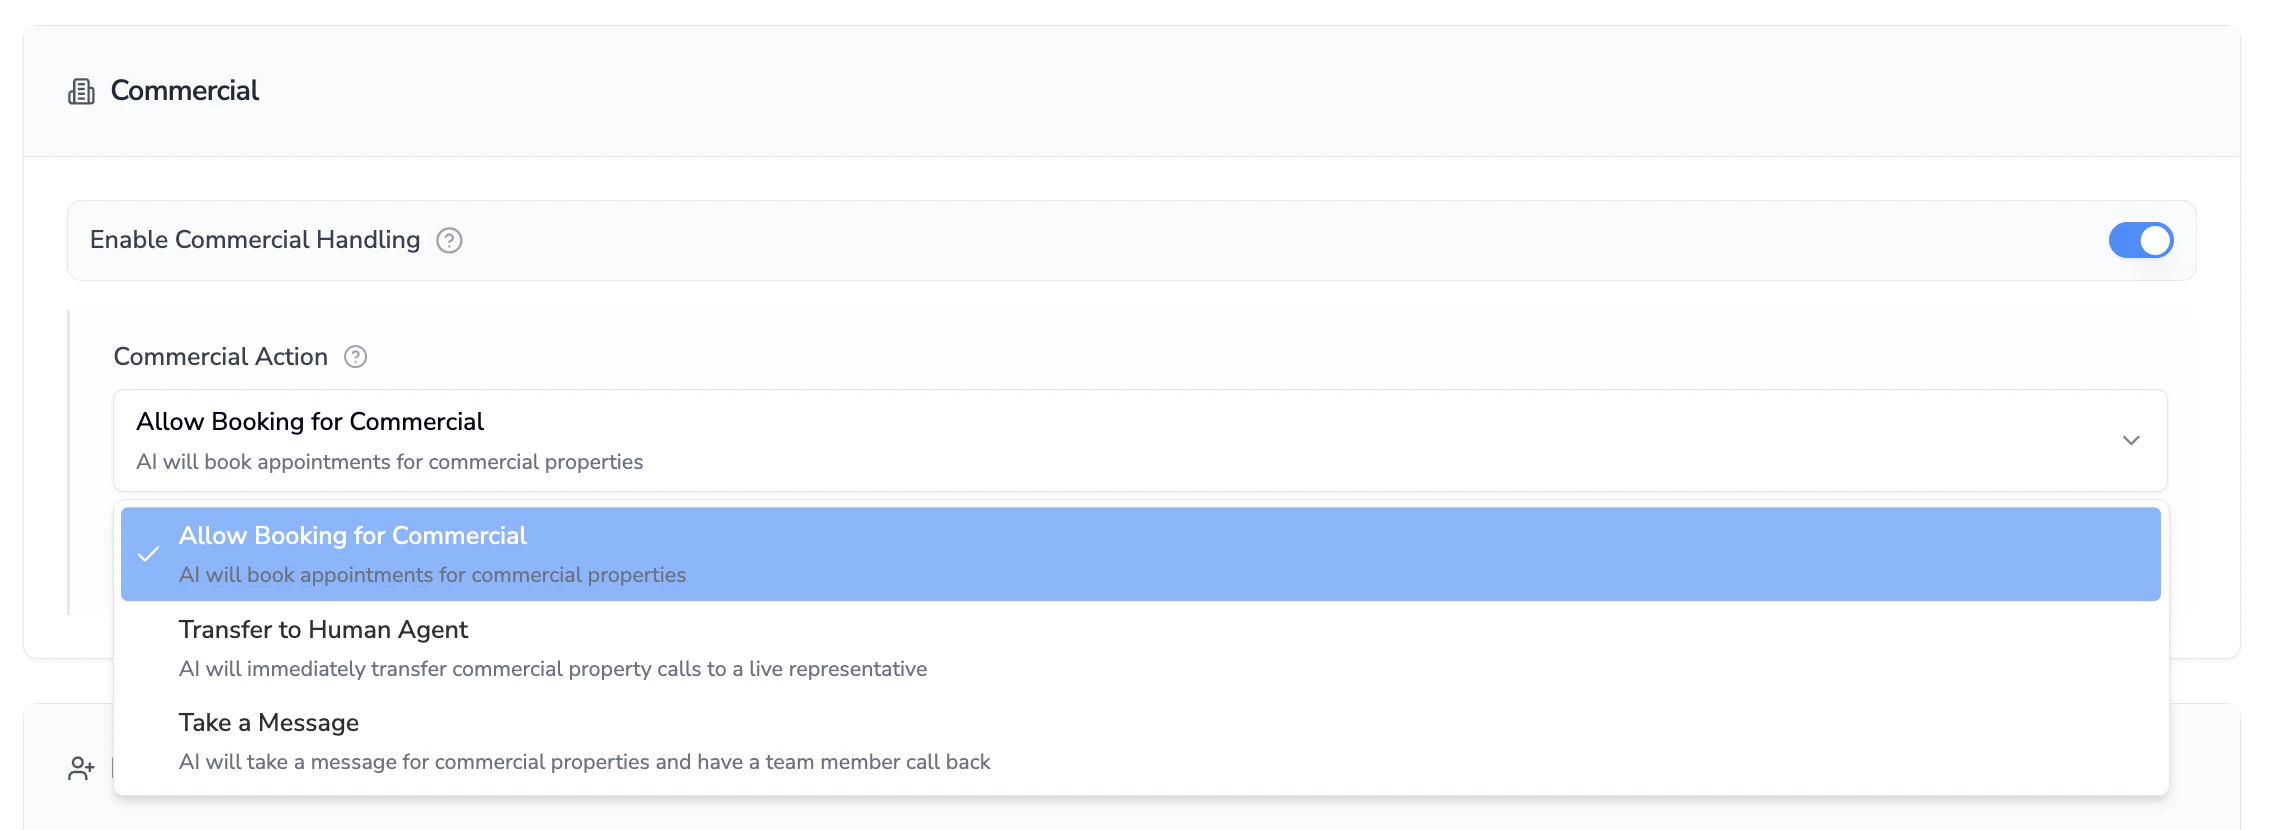
- Commercial
- Enable this if you want the assistant to be able to handle customers calling in to schedule an appointment for a commercial property
- Select from the dropdown the appropriate action the assistant should take when the customer is calling for a commercial property:
- Allow booking
- Transfer to a human agent (only if Transferring is enabled)
- Take a message
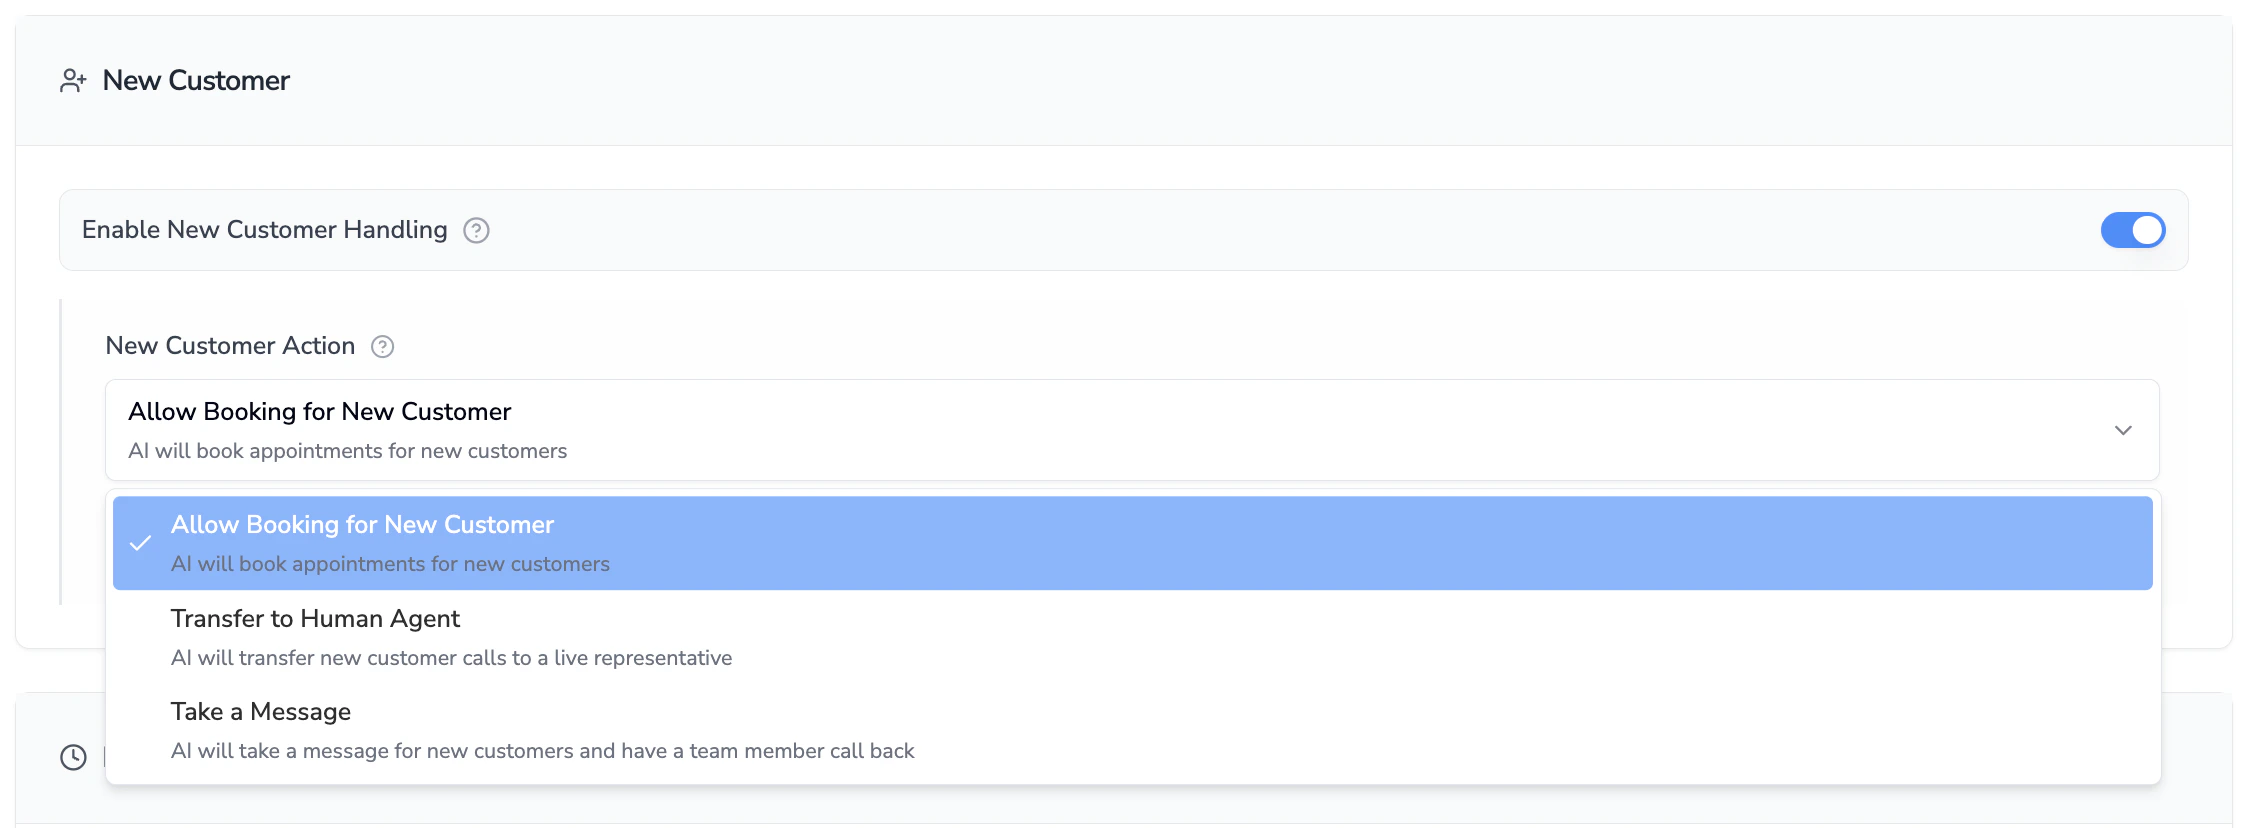
- New Customer
- Enable this if you want the assistant to be able to handle new customers calling in to schedule an appointment
- Select from the dropdown the appropriate action the assistant should take when the customer is new:
- Allow booking
- Transfer to a human agent (only if Transferring is enabled)
- Take a message
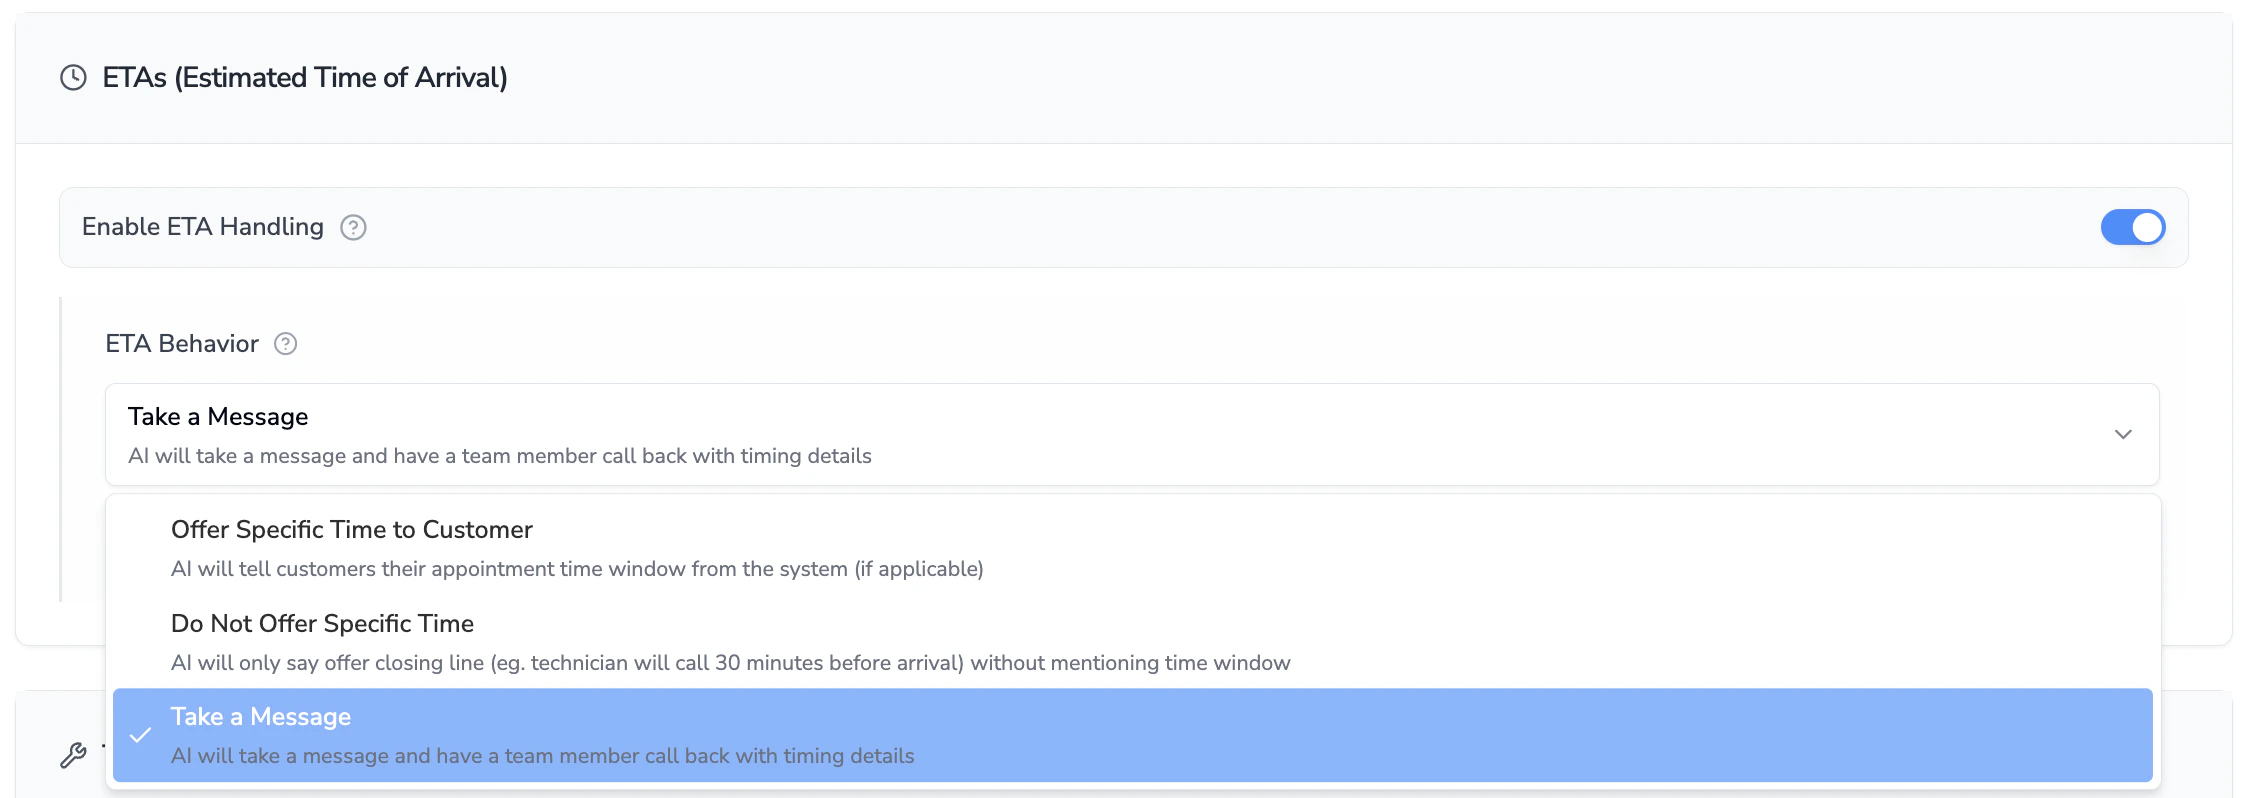
- ETAs
- Toggle this on if you want the agent to offer technician arrival time frames to customers (most commonly this is toggled on)
- Select from the dropdown the appropriate action the assistant should take when the customer is calling to request technician ETA:
- Offer a specific time - will use exact time in ServiceTitan
- Do not offer a specific time - will use technician closing line
- Take a message
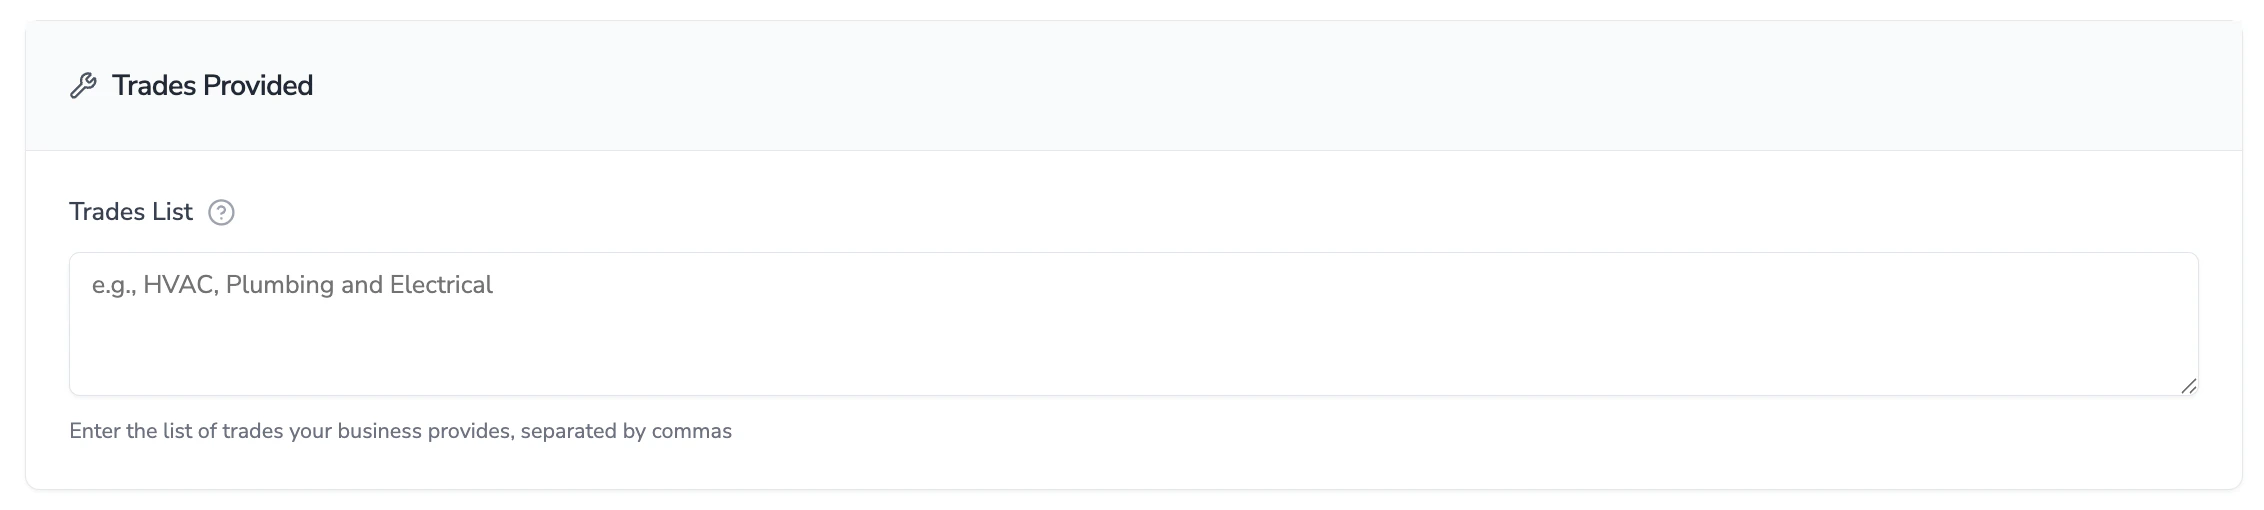
- Trades Provided
- Enter a general list of trades provided (e.g, HVAC, Electrical, Plumbing)
- After Hours Available
- Enable this if you want the assistant to tell the customer that your company provides after hours services
- Ask Equipment Age
- Enable this if you want the assistant to collect the age of their HVAC equipment (most commonly toggled on)
- Confirm Membership Status
- Enable this if you want the assistant to verify membership status on a customer from ServiceTitan (most commonly toggled on)
- This allows the assistant to relay the correct fees to the customer based on their membership status
Many sections have a toggle called Additional Question. Toggle this on to define a list of questions that you would want your assistant to ask the customer in relation to the section’s relevant topic. For example, in the New Customer section, you may add questions such as “How did you hear of us?” to capture this information from new customers. PRO TIP: Keep in mind that the more questions the AI asks, the longer the call flow, and the higher the likelihood the customer drops off the line before completing the booking. It is recommended to keep additional questions to a minimum and include only the most critical ones.