Note:The invitation process requires coordination between your team and Avoca. Make sure to complete all steps in order to ensure proper access configuration.
Step-by-Step Instructions
In your Google Ads dashboard (NOT Google Local Services Ads), navigate to Admin → Access and Security. In the Users tab, click the blue plus sign to send a new user invitation.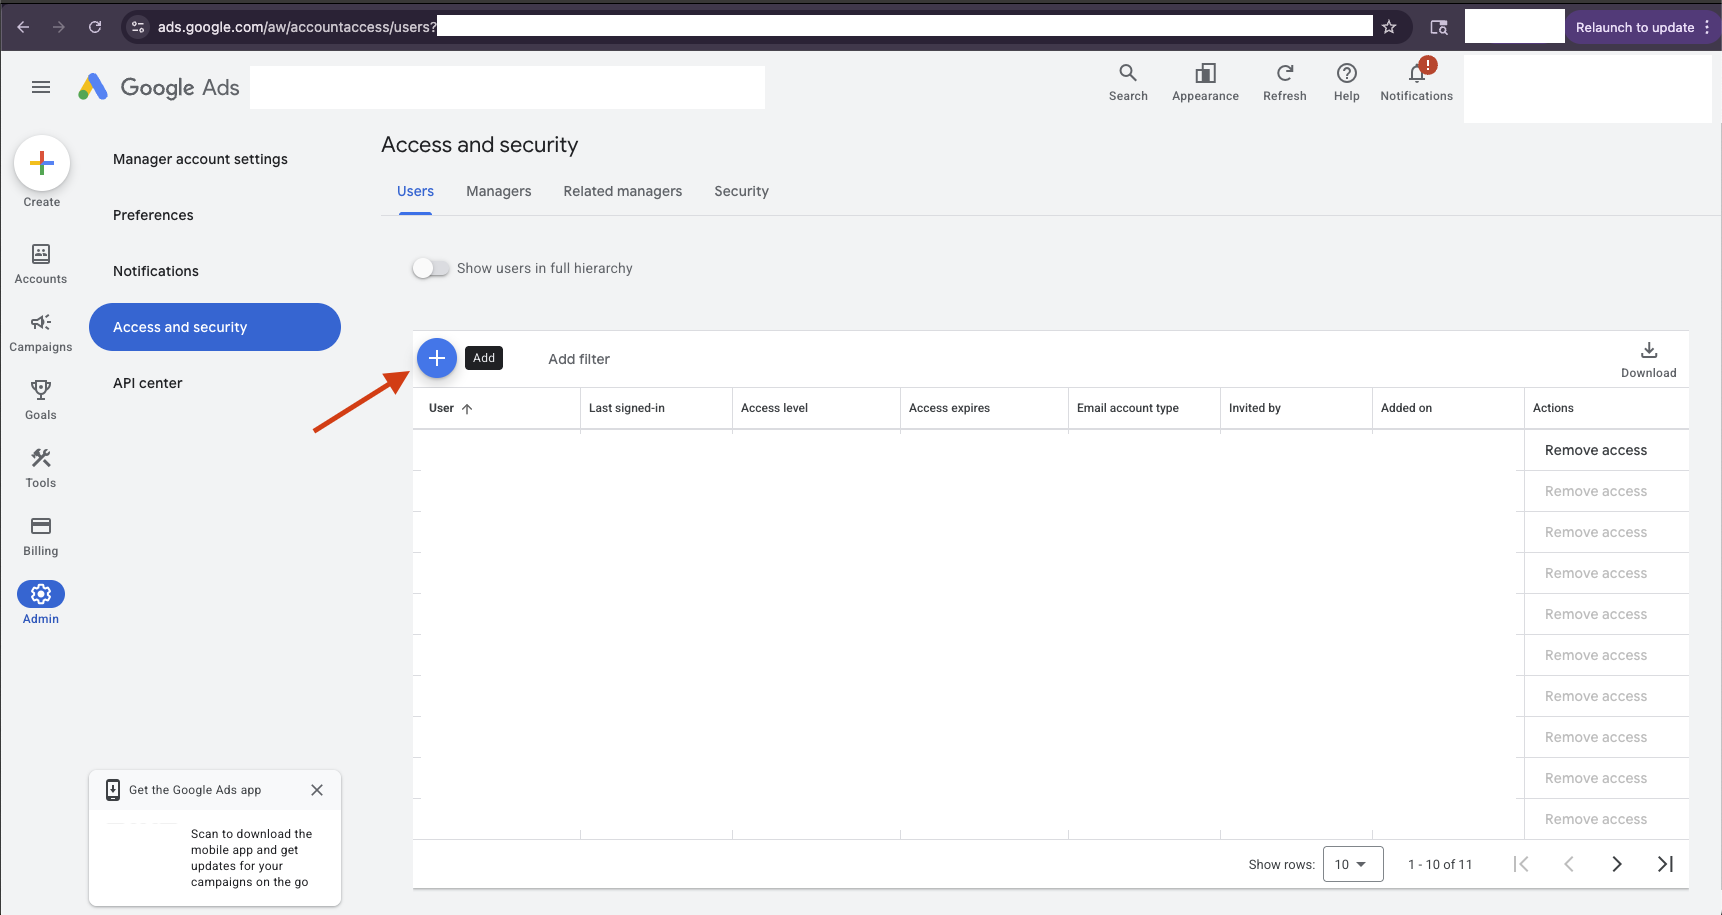
Fill out the invitation form with the Avoca email address provided by your CSM/TAM (format: 
customer-name@avoca.ai). Initially, select Read only access level, then click Send invitation.Wait for Avoca to accept the invitation on our end. You will receive a notification in your account once the invitation is accepted.
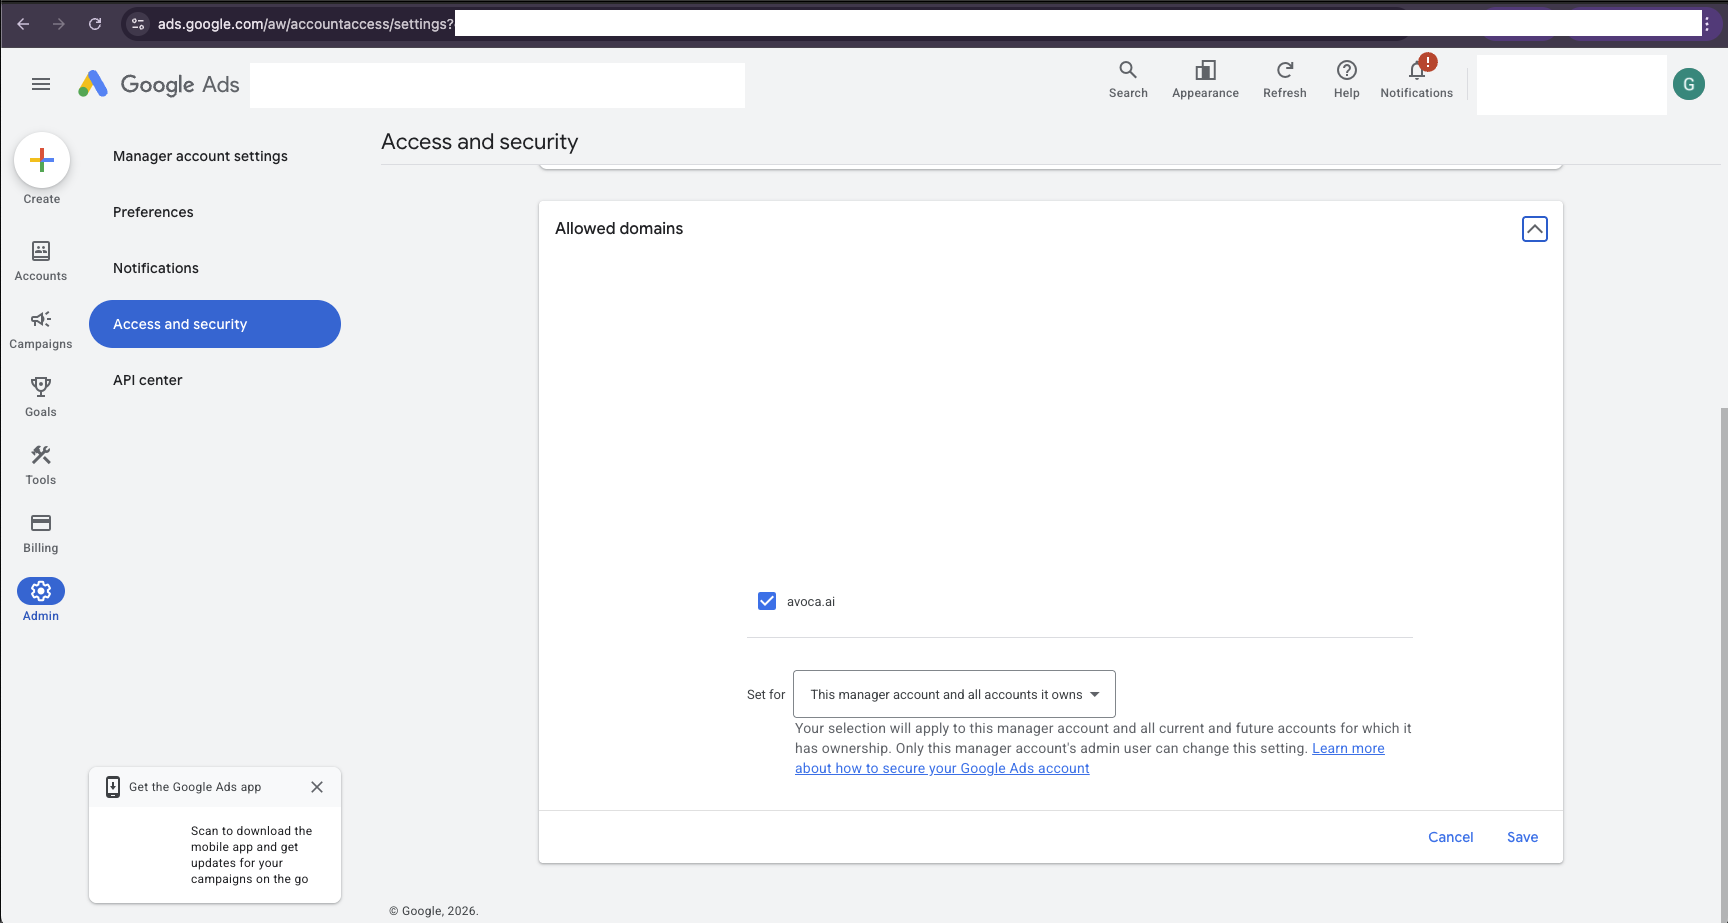
Navigate to the Security tab and scroll down to the Allowed domains section. Ensure that avoca.ai is enabled in the allowed domains list.